Commons:Commonist/es
Commonist does not work at the moment!
See Commons:Upload tools for alternatives.


Commonist es un programa libre en Java que permite importar un gran número de archivos a Wikimedia Commons y otras instalaciones de Mediawiki. También es capaz de importar archivos a cualquier wiki con algunos ajustes.
Instalación
Instalar Java 8 o posterior
Para poder instalar Commonist, necesitas Java 8 o una versión más reciente.
- Si aún no has instalado Java, ve a la página de descarga de Java y descarga la versión para tu sistema operativo.
- Para la distribución Ubuntu de Linux, utiliza la aplicación integrada Centro de Software de Ubuntu, busca Java e instala OpenJDK Java 7 Runtime.
- Sigue los pasos del instalador de Java.
Descargar e instalar Commonist
Manera más fácil
Como el código no está firmado, tendrás que añadir una excepción.
The most specific exception you could add is https://djini.de/commonist/ws/commonist.jnlp but you could also add just the site https://djini.de. See https://www.java.com/en/download/faq/exception_sitelist.xml for details.
Esta es la manera más fácil de acceder a Commonist. Si este método produce un error de permisos al tratar de subir imágenes, descarga y ejecuta Commonist de la forma que se explica a continuación.
Descarga e instalación
https://www.java.com provides a Java Runtime Environment (JRE) that should be installed on your computer. JRE allows the cross-platform development of Software for Linux, Windows, Mac. Commonist Java Byte Code is executed by the JRE on your operating system.
Windows
- Descarga el archivo binario de Commonist
commonist-x.x.x-bin.zip - Extrae el binario a tu escritorio. Se creará una carpeta
commonist-x.x.x(donde las x se sustituyen por el número de versión).[1] - Abre Inicio → Ejecutar
- Teclea
cmd.exey haz clic en Aceptar - Teclea
chdir C:\- Esto cambiará el directorio a
C:\
- Esto cambiará el directorio a
- Encuentra la carpeta bin en la carpeta que acabas de extraer.
- En la carpeta cmd, cambia el directorio a la carpeta donde extrajiste la carpeta bin. Teclea
cdseguido de la dirección decommonist.baten tu computadora. - Teclea
bin\commonst.baty pulsa Intro.
![[1]](http://gyazo.com/f49ce8d8803ae6481c19237684939026.png)
o bien
- Descárgalo a
C:\Windowsy extráelo allí. - Haz clic derecho con el ratón en
\bin\commonist.baty crea un acceso directo al escritorio.
Unix, Linux o macOS
Descarga commonist-x.x.x.zip de djini.de/commonist/ a tu carpeta /home. Desempaquétalo/extráelo. Creará una nueva carpeta commonist-x.x.x (donde las x se sustituyen por el número de versión).
Extracting it from File Roller will not create a folder. So first create a folder named "commonist" (or any name you like) inside your home folder. Then extract there the three folders included (bin, etc, lib). Go inside the bin folder, right click and change the properties of the commonist file to make it executable.
Start Commonist with bin/commonist (After chmod u+x bin/commonist this may do). Browse down to the /home/commonist-x.x.x/bin folder and double click on commonist.
Ubuntu Linux
To hook Commonist to a launcher icon on the top tool bar, firstly right click this icon, ![]() and save as an SVG (not PNG) to Desktop. Now control drag the
and save as an SVG (not PNG) to Desktop. Now control drag the commonist file found in /home/bin to the tool bar. In the pop-up dialogue, double click on the spring icon, you are asked to choose an icon, navigate to Desktop and select the ![]() hammer & sickle icon.
hammer & sickle icon.
Escritorio Unity en Ubuntu 12.04
Este escritorio presenta obstáculos significativos. Para empezar, crea dos carpetas nuevas en tu carpeta personal:
commonistorsbin/commonist- usr- with sub folders share/icons
Las necesitarás posteriormente.
- Descarga el archivo zip y extráelo en commonist.
- Copia
commonist.svgy guárdalo en share/icons - Ve a commonist/bin, haz clic derecho en el archivo commonist, selecciona la pestaña de permisos y habilita la ejecución.
- Desde el Centro de Software de Ubuntu → Herramientas para desarrolladores → Java, instala el entorno de ejecución Open JDK Java 7.
Ahora tienes que crear el lanzador. Esto se ha deshabilitado en la versión 12.04. Necesitas instalar dos paquetes a través de la terminal.
En la terminal
sudo apt-get install gnome-panel
sudo apt-get install ubuntu-tweak
nautilus -q
- Ubuntu-tweak can be downloaded from the link. It hides in /downloads. It is a deb file. Right click, and open and install using Ubuntu Software Center.
Ubuntu Tweak is installed in Apps/Customization. Using Ubuntu-Tweak
- Select “Admins” tab, click on the “Scripts” from the Personal category
- You will see 2 columns Enabled Scripts and Disabled Scripts
- Find “Create Launcher…” in the Disabled Scripts column and drag it to Enabled Scripts column under nautilus-scripts
Back to the terminal
nautilus -q
Go to sbin/commonist. Right click anywhere on the folder and select Scripts -> Create Launcher… from the context menu
The Create Launcher dialog box pops up. Give a name, Commonist, Browse for the file (sbin/commonist), Add the icon (usr/share/icons) and comment if you need. The launcher is created in the sbin/commonist folder.
Drag the launcher to the Unity Launcher and you are done.
Mint 16 (escritorio Mate)
En primer lugar, copia el icono Commonist.svg de esta página a tu escritorio como SVG, no como PNG (clic derecho en este icono, ![]() , guardar página).
, guardar página).
Create a /bin/commonist folder in home. Download anywhere commonist-x.x.x-bin.zip from djini.de/software/commonist. Extract it into /bin/commonist.
- Mint 16: Back to your desktop, right click, create launcher. In the Command dialog box browse through to ./bin/commonist/commonist-x.x.x/commonist, and click the icon to replace it with commonist.svg (where ever that was saved).
- Mint 16: But, with Mate, you can add this to the menu. right click Menu, Edit Menu. Then Application->Internet and Add item. In the Command dialog box type ./bin/commonist/commonist-x.x.x/commonist, and click the icon to replace it with commonist.svg (where ever that was saved). That bit was easy.
Uso
With the installed version of Commonist:
- After Commonist is installed and started a small hammer and sickle icon will pop up.
- On Windows:
- You will additionally see a terminal window which you can't close while the program is running.
- Another window will pop up. Click "continue".
- The Commonist program will appear.

When the Commonist program has started, note in the lower left is a tree view of your file system. Choose the folder which contains the images you want to upload. After you have selected this folder you will notice a small status message at bottom that Commonist is reading the content of the folder. Commonist will display on the right side a preview of each file.
- Promoting commonist
Please place {{Commonist}} in the description box before uploading. On the newly created file page, this template will be displayed:
Alternatively, for uploaders which prefer not to display the icon on their uploads, {{Commonist no icon}} may be used which functions in the same way:
These templates will not only help promote Commonist but it will place your files into a hidden category named Uploaded with Commonist.
Alternatively, when there's a second piece of information to be shown, one may add a bar like {{Inkscape and Commonist}} or {{Adobe and Commonist}}.
When using {{Image generation}}, the optional parameter $ adds the ![]() uploaded with Commonist
uploaded with Commonist
Users of Commonist may also place either {{User Commonist}} or {{User Commonist no icon}} on their user page.
Ajustes generales de subida
In the upper left you see several fields of a mask below the label "general upload settings", on top of which you will find the fields necessary for the account you want to use for upload:
- user
- In the "user" field type in your user name on the wiki where you want to upload your images. Note that you enter it without the User: prefix.
- password
- Type in your password for this account there. It will be made invisible to the reader with asterisks (but will be transferred unencrypted over the internet.)
- wiki
- At the "wiki" drop down menu you can select the wiki where you want to upload the file. In case of Wikimedia Commons choose "commons". Note that within that wiki you need to own the very account you specified above. For a different wiki see Commonist on Other Wikis below.
- Further down you can enter general information that will be embedded in the image descriptions of all images you upload. Template:Information is being used for the structured image description (See Commons:First steps for details about the template; in other wikis beside Commons a free form description without the use of a template is being used by Commonist).
- description
- There you can enter the global description in normal wiki syntax which will be displayed at all image pages of images you upload within that session.
- source
- Use a statement such as “Own work.” (or, even better, the internationalized {{Own}} template) if you created that file yourself. Otherwise please supply a
- Link to a website
- Name of an institution
- Book source
- etc.
- Ten en cuenta que solo puedes introducir una fuente para todas las imágenes que subas de una vez.
- date
- Date of creation of the images you want to upload (or date of release if not available), preferably in ISO 8601 format, such as “
taken on 2006-01-08” for an image taken on 8 January 2006.
- author
- Author(s) of the files. If you don’t know any individual, use the name of the institution(s) which released it. In case of self-made work, put your real name and your linked user name in parentheses, such as “
John Q. Public ({{u|JQPublic}})”. This will read as “John Q. Public (JQPublic)”. You might as well directly link your real name to the user name such as “[[User:JQPublic|John Q. Public]]”.
- categories
- Enter one specific category there that fits to all of your images you want to upload without the namespace prefix or leave it blank in case you want to add the images afterwards to a gallery page.
To add several categories, in "categories" write: [[Category:VisualEditor-fr]]
[[Category:sambucus ebulus]].
That way you can enter categories containing commas. Be as specific as possible. Don’t add an image to an overcrowded root category like "Astronomy". In order to find a right category for your images the category tree will help you a lot.
- license
- In Wikimedia Commons it is essential that every file is correctly licensed. So choose out of the "license" the license you want to use for your images. For correct licensing please see Commons:Licensing. In case you did not find the right license leave it blank and have a look at Commons:Copyright tags but don't forget to add the correct license tag afterwards, otherwise your files will be deleted without further notice.
Formularios de imágenes

On the top right you see two buttons labeled "deselect all" and "select all". Click these buttons to check/uncheck the upload status of all images in the current collection. The upload status is shown in the upload check box, next to each file thumbnail. You can manually check/uncheck single files, by clicking on the individual check boxes.
Click (single click) on the image thumbnail and the full size image will appear in a separate window. (See the screenshot.)
Justo a cada imagen en miniatura, podrás encontrar también los siguientes campos de formulario:
- name
- In the "name" field, you type the destination file name of the image. On starting, the local file name will automatically be displayed here and this will be used by default. You are strongly advised to change the local file name into something meaningful. This edit is non destructive. The file name will not be changed on your hard disk, just the destination file name.
- Take special note of this, you cannot rename your file once it has been uploaded.
- Non-descriptive file names - e. g. names like “DSC123456.jpg”, render them a lot harder to find and use. Also it is very likely that another user will try to upload a file with the very same name but with different content, and that file will be suggested for deletion.
- description
- In the "description" field, you enter the description of that file. Use normal wiki syntax. This will be displayed on the image page; it will be appended to the general description. Please give a good description of the content of each file. What do you see, hear, or otherwise perceive? If it's an item of artwork, please provide a brief historical background. In case of scientific data, a brief scientific abstract of the file. Descriptions can be in any language, but it is always a good idea to include an English description as well. If you speak multiple languages, consider adding the description in each of them.
(Please use the language templates as described on Commons:Multilinguality, like in this code example for English: "{{en|Example description}}").
- permission
- Will be filled into the corresponding field in the Template:Information
- coordinates
- Specify geocoordinates here as comma-separated decimal values to put a Template:Location_dec template on the image description page. Otherwise (i.e. if no two comma separated values are found) the string will be transmitted without changes; this is usefull if you would like to give your own formated geolocation string.
- categories
- In the "categories" field, you specify additional categories (without the category namespace prefix) separated by a vertical bar or pipe |. Please also try to be as specific as possible. Try to avoid using more than two topic categories per image, they can be added later.
Proxy
Los ajustes de proxy se leen desde las propiedades de sistema de Java http.proxyHost, http.proxyPort y http.nonProxyHosts. Si no están fijadas, se utiliza la variable de entorno http_proxy.
Upload
After you have finished your preparations for the upload click on the "upload" button in the lower right corner of the main window. There is a status bar at the bottom line explaining what Commonist is doing. You can cancel the upload at any time by clicking on "abort" next to the "upload" button. If everything works well, it will display first the login procedure and then the upload status of the single files there. If something went wrong please check if you typed in the correct user name, password and wiki.
Every uploaded file will be added automatically to your watchlist, so that you can always track the changes by others to your files. Every uploaded file also will be added to a personal user gallery located at User:YOUR_USERNAME/gallery, grouped by upload jobs and upload date, with the image description as description of the thumbnail, so that you will automatically have a pleasant overview of all of your uploads.
Copiar y pegar
Es posible que pegar con clic derecho no funcione. En Windows, usa Ctrl+v para pegar, Ctrl+c para copiar, Ctrl+x para cortar y la tecla Supr para suprimir. Arrastrar con el ratón debería funcionar, así como copiar con el ratón desde otras aplicaciones.
Commonist en otros wikis
- Requisitos
- Solamente hay soporte para wikis que tienen activada la subida de archivos mediante
api.php. - La wiki debe utilizar MediaWiki 1.16.0 o una versión más reciente (comprueba tu versión en Especial:Versión).
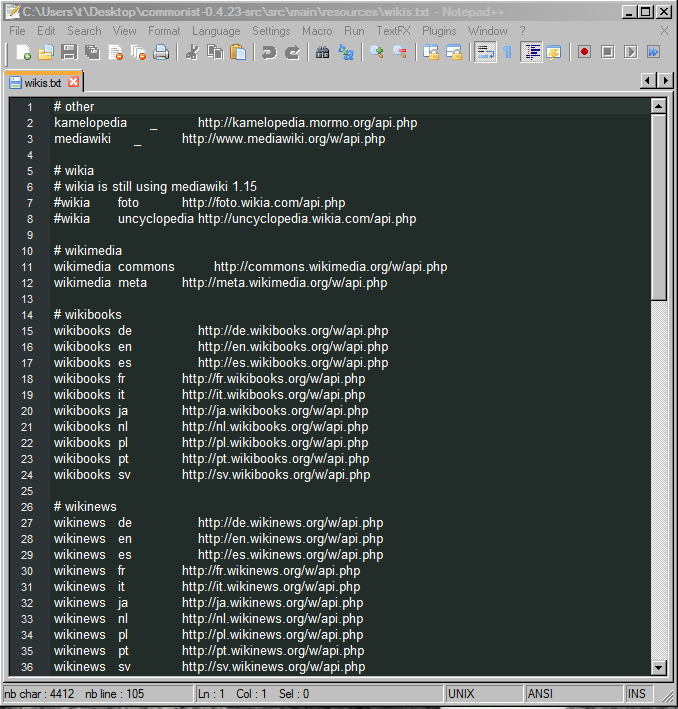
Encuentra el archivo wikis.txt. El archivo wikis.txt también se encuentra en la carpeta bin en
- C:\Users\t\Desktop\commonist-0.5.0-src\src\main\resources
También puede haber una copia de wikis.txt en ~/.commonist/wikis.txt
Añade una línea en este archivo wikis.txt. Esta línea consta de tres campos:
- Nombre del wiki,
- código de idioma o «_» y
- la URL de su archivo api.php.
Por ejemplo, Kamelopedia tiene este aspecto:
kamelopedia _ http://kamelopedia.mormo.org/api.php
Pincha aquí para ver una captura de pantalla de wikis.txt tal como se ve en el editor de texto Notepad++. Tu formato debería parecerse al de las líneas 2 y 3.
Geocodificación
Geocodificar es adjuntar información sobre la localización geográfica a los archivos subidos mediante Commonist. Si una imagen incluye geocodificación entre sus metadatos EXIF integrados, Commonist extrae esos datos y añade una plantilla {{Location dec}} a la página de descripción del archivo (imagen).
La mejor forma de geocodificar tus imágenes es con un receptor GPS integrado en tu cámara o sincronizado con un registrador GPS en tu computadora. Para aquellos que no dispongan de GPS pero conozcan la localización de la cámara en el momento en que se sacó la foto, hay dos formar de geocodificar imágenes:
Opción 1: Panorado Flyer
This option is for windows users with Google Earth and Panorado Flyer installed only. It's advantage is that you can easily set the camera heading. Search the location in Google Earth and place it in the middle of the screen. Rotate the satellite map so that the viewing direction of the image is equal to the upward direction of the screen. Then right click on your image in Explorer, Panorado Flyer->Get location from Google Earth, OK. Start Commonist and the coordinates text field will be filled automatically.
Opción 2: Google Maps
An other way to save time is adding a special bookmark to the browser, and locating the position of the camera on a maps.google.com map. When the special bookmark is used, the browser generates geocode tag. This works on Linux and other operating systems.
- First create a bookmark (on Firefox: Bookmarks>Organise Bookmarks>New Bookmark) with the location as:
javascript:void(prompt('',"{{location dec|" + gApplication.getMap().getCenter().lat().toFixed(4) + "|" + gApplication.getMap().getCenter().lng().toFixed(4) + "}}"));
For each image:
- Open Commonist, and select the target image.
- Load maps.google.com in the browser.
- Search for the correct location.
- Click on "Satellite" if it helps to find the location more easily, and zoom in.
- Double Click on the exact location the media was recorded to zoom and center the map.
- Click on your bookmark and you'll get a prompt with the geocode tag to add to the image.
- Press Ctrl-C to copy this tag.
- Switch to Commonist, click on the description field of the target image, press Ctrl-V to paste the tag.
Errores e incidencias
Puedes enviar comentarios al autor del programa a través de:
- Rastreador de incidencias de GitHub (recomendado)
- Página de discusión
Licencia y código fuente
Commonist está licenciado bajo la Licencia Pública General de GNU (artículo de Wikipedia).
El código fuente está disponible a través de GitHub.
Véase también
- Commons:VicuñaUploader – Vicuña uploader, another Java batch uploader
- Image File Migrator – a Python tool that can download files from one wiki and upload them to another.
- User:Nichalp/Upload script – a Perl script to batch upload images by reading a CSV file.