Category:Bridges in Australia photographed in 2015
Jump to navigation
Jump to search
Subcategories
This category has only the following subcategory.
S
Media in category "Bridges in Australia photographed in 2015"
The following 77 files are in this category, out of 77 total.
-
 Balranald Bridge 001.JPG 6,016 × 4,000; 10.37 MB
-
 Balranald Bridge 002.JPG 6,016 × 4,000; 9.36 MB
-
 Balranald Bridge 003.JPG 6,016 × 4,000; 9.65 MB
-
 Balranald Bridge 004.JPG 6,016 × 4,000; 9.32 MB
-
 Balranald Bridge 005.JPG 6,016 × 4,000; 10.16 MB
-
 Balranald Bridge 006.JPG 5,696 × 3,664; 8.13 MB
-
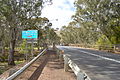
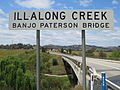 Banjo Paterson Bridge Illalong Creek Walter Griffin Way slightly curved concrete Bridge.JPG 4,608 × 3,456; 3.54 MB
-
 Bribie Island Bridge photographed from Sandstone Point, Queensland.jpg 3,264 × 2,448; 1.92 MB
-
 Caroona Mooki River Bridge 001.JPG 6,016 × 4,000; 9.79 MB
-
 Caroona Mooki River Bridge 002.JPG 6,016 × 4,000; 10.22 MB
-
 Casterton Glenelg Highway Bridge 001.JPG 6,016 × 4,000; 12.21 MB
-
 Casterton Glenelg Highway Bridge 002.JPG 4,920 × 2,896; 7.23 MB
-
 Centenary Bridge seen from Chelmer, Queensland.jpeg 2,202 × 1,684; 1.41 MB
-
 Cootamundra John Rees Bridge 001.JPG 5,632 × 3,680; 9.81 MB
-
 Cootamundra Stratton Bridge 001.JPG 5,616 × 3,472; 9.17 MB
-
 Cootamundra Stratton Bridge 002.JPG 5,616 × 3,456; 9.07 MB
-
 Cootamundra Stratton Bridge 003.JPG 6,016 × 4,000; 10.79 MB
-
 Cootamundra Stratton Bridge 004.JPG 5,728 × 3,440; 9.77 MB
-
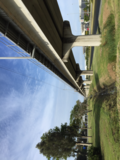
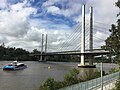 Eleanor Schonell Bridge on 2015-06-13.JPG 3,264 × 2,448; 2.08 MB
-
 Eleanor Schonell Bridge seen from Fairfield, Queensland 01.jpeg 3,264 × 2,448; 1.67 MB
-
 Eleanor Schonell Bridge seen from Fairfield, Queensland 02.jpeg 2,448 × 3,264; 2.68 MB
-
 Eleanor Schonell Bridge, Brisbane 07.jpeg 2,326 × 3,103; 962 KB
-
 Eleanor Schonell Bridge, Brisbane 08.jpeg 3,264 × 2,448; 1.99 MB
-
 Eleveted railway line approaching Domestic Terminal at Brisbane Airport.tiff 3,264 × 2,448; 30.5 MB
-
 Euston-Robinvale Bridge 001.JPG 5,616 × 3,608; 7.68 MB
-
 Euston-Robinvale Bridge 002.JPG 5,616 × 3,608; 7.68 MB
-
 Euston-Robinvale Bridge 003.JPG 6,016 × 4,000; 7.94 MB
-
 Euston-Robinvale Bridge 004.JPG 4,000 × 6,016; 7.55 MB
-
 Euston-Robinvale Bridge 005.JPG 5,320 × 3,616; 6.79 MB
-
 Euston-Robinvale Bridge 006.JPG 6,016 × 4,000; 8.57 MB
-
 Footbridge, Alice Springs, 2015 (01).JPG 3,968 × 2,232; 5.28 MB
-
 Footbridge, Alice Springs, 2015 (02).JPG 3,968 × 2,232; 6.48 MB
-
 Launceston Cataract Gorge Alexandra Suspension Bridge 001.JPG 3,832 × 4,968; 9.41 MB
-
 Launceston Cataract Gorge Alexandra Suspension Bridge 002.JPG 5,736 × 3,674; 8.8 MB
-
 Launceston Cataract Gorge Alexandra Suspension Bridge Plaque.JPG 3,922 × 2,414; 4.76 MB
-
 Launceston Cataract Gorge First Basin 001.JPG 6,016 × 4,000; 9.49 MB
-
 Launceston Cataract Gorge First Basin 002.JPG 6,016 × 4,000; 10.69 MB
-
 Launceston Cataract Gorge First Basin 003.JPG 6,016 × 4,000; 10.75 MB
-
 Launceston King´s Bridge 001 (cropped).JPG 5,593 × 2,513; 8.52 MB
-
 Launceston King´s Bridge 001.JPG 5,593 × 3,828; 11.04 MB
-
 Launceston King´s Bridge 002.JPG 6,016 × 4,000; 9.52 MB
-
 Launceston King´s Bridge Stone.JPG 6,016 × 4,000; 11.15 MB
-
 Malmsbury Viaduct.jpg 2,048 × 1,536; 1,018 KB
-
 Mildura George Chaffey Bridge 001.JPG 6,016 × 4,000; 7.94 MB
-
 Mildura George Chaffey Bridge 002.JPG 5,456 × 3,728; 6.39 MB
-
 Mildura George Chaffey Bridge 003.JPG 6,016 × 4,000; 10.05 MB
-
 Railway viaduct over Montague Rd, South Brisbane.JPG 3,264 × 2,448; 2.17 MB
-
 Sandstone Point Hotel 14.jpeg 3,264 × 2,448; 1.78 MB
-
 Sims Street Bridge 1.jpg 3,264 × 2,448; 1.56 MB
-
 Sims Street Bridge 2.jpg 3,264 × 2,448; 1.71 MB
-
 Sims Street Bridge sign.jpg 3,264 × 2,448; 1.86 MB
-
 Sofala Restored Footbridge.JPG 6,016 × 4,000; 8.24 MB
-
 Train crossing the Merivale Bridge seen from South Brisbane.jpg 3,264 × 2,448; 2.36 MB
-
 Uarbry Pipers Bridge 001.JPG 5,715 × 3,619; 8.49 MB
-
 Uarbry Pipers Bridge 002.JPG 5,406 × 3,482; 6.97 MB
-
 Uarbry Pipers Bridge 003.JPG 4,471 × 2,050; 3.75 MB
-
 Walter Taylor Bridge seen from Indooroopilly, Queensland 02.jpg 3,264 × 2,448; 1.67 MB
-
 Walter Taylor Bridge, Indooroopilly tower.JPG 3,264 × 2,448; 2.46 MB
-
 Walter Taylor Bridge, main span.JPG 3,264 × 2,448; 2.37 MB
-
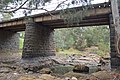
 Wee Jasper Road, Bridge over Murrumbidgee river 01.jpg 4,967 × 3,311; 5.21 MB
-
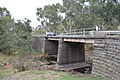
 Wee Jasper Road, Bridge over Murrumbidgee river 02.jpg 5,184 × 3,456; 6.31 MB
-
 Westgatemain.jpg 3,150 × 2,310; 1.56 MB
-
 Wildwood Road Bridge 001.JPG 6,016 × 4,000; 11.84 MB
-
 Wildwood Road Bridge 002.JPG 6,016 × 4,000; 11.14 MB
-
 Wildwood Road Bridge 003.JPG 5,192 × 2,944; 6.09 MB
-
 Wildwood Road Bridge 004.JPG 6,016 × 4,000; 12.08 MB
-
 Wildwood Road Bridge 005.JPG 5,560 × 3,456; 8.15 MB
-
 Wildwood Road Bridge 006.JPG 5,664 × 3,664; 10.05 MB
-
 Wildwood Road Bridge 007.JPG 5,320 × 3,744; 10.2 MB
-
 Wildwood Road Bridge 008.JPG 6,016 × 4,000; 10.67 MB
-
 Wildwood Road Bridge 009.JPG 6,016 × 4,000; 12.1 MB
-
 Wildwood Road Bridge 010.JPG 6,016 × 4,000; 10.72 MB
-
 Wildwood Road Bridge 011.JPG 6,016 × 4,000; 11.44 MB
-
 Wildwood Road Bridge 012.JPG 6,016 × 4,000; 7.81 MB
-
 Wildwood Road Bridge 013.JPG 6,016 × 4,000; 10.51 MB
-
 Wildwood Road Bridge 014.JPG 6,016 × 4,000; 10.47 MB
-
 Wildwood Road Bridge 015.JPG 6,016 × 4,000; 10.54 MB


.JPG)
.JPG)


.JPG)


