Help:Numérisation

Numériser une photo ou un document pour Commons peut être relativement facile si vous savez ce que vous faites et, si vous êtes intéressé par l'histoire, ce peut être un excellent moyen de partager votre passion avec le monde entier.
Il existe d'excellentes sources de documents tombés dans le domaine public qui sont :
- Les bibliothèques (en particulier celles des grandes villes ou, encore mieux, des universités, où généralement les étudiants et les autres personnes qui les fréquentent disposent d'un accès beaucoup plus facile que le public à des livres anciens).
- Les sociétés historiques
- Les librairies de livres d'occasion
Conseils généraux[edit]
Vérifiez que votre écran est réglé correctement, en particulier la luminosité et le contraste. S'il est trop lumineux ou si le contraste est trop faible vos images auront une teinte grisâtre sur des écrans mieux réglés. Ceci — Normalement vous devriez distinguer 3 cercles dans cette image — permet de tester le réglage de votre écran. Le paragraphe Votre écran fournit d'autres conseils.
Il ne faut jamais numériser en-dessous de 300 ppp à moins que votre scanner ait des spécifications qui ne le permettent pas. La taille du fichier résultant sera peut-être importante mais c'est la résolution minimale pour reproduire avec une qualité raisonnable les gravures, illustrations et peintures, quel que soit leur degré de finesse. Les fichiers de Commons doivent avoir une taille inférieure à 20 MB (Commons déclenche une alerte pour les fichiers d'une taille supérieure à 5 MB, mais pratiquement toutes les Images remarquables dont peuvent faire partie les numérisations de qualité, dépassent par nécessité cette taille, aussi peut on ignorer cet avertissement et déclencher malgré tout l'importation. La limite est fixée à cette valeur surtout pour les diagrammes et les photos qui peuvent être compressés avec plus d'efficacité.)
Ceci dit, 400 ppp est tout à fait suffisant pour la plupart des numérisations, 600 ou (encore plus rare) 800 ppp peuvent être nécessaires uniquement pour la numérisation de gravures très détaillées ou pour des copies de grande qualité, lorsque les maitres graveurs (comme William Hogarth et Gustave Doré) incluent des détails plus petits que ce que l'on peut voir à l'œil nu. 500 ppp et 800 ppp peuvent également convenir pour des images de la taille d'une carte postale ou plus petit (8 cm x 10 cm) car cela permet de donner à l'image numérisée une taille supérieure à l'original. 1200 ppp est excessif sauf si vous numérisez des diapositives ou des films. Si c'est le cas consultez le manuel de votre scanner.
Nettoyez la glace de votre scanner avant de numériser, en particulier si des poils d'animaux domestique, de la poussière, etc. ont tendance à se glisser sur le support du scanner.
Utilisez l'option de prévisualisation du logiciel de numérisation (s'il en dispose), pour placer le document aussi droit que possible. On peut faire pivoter l'image après numérisation, mais c'est souvent plus difficile. Chaque logiciel de numérisation est différent aussi apprenez à bien connaitre les fonctionnalités disponibles (passez au mode "professionnel" ou "avancé" s'il existe), familiarisez vous avec son fonctionnement jusqu'à ce que vous compreniez bien comment l'utiliser.
Si vous avez un document de grande taille qui ne peut pas être numérisé en une seule pièce, ne vous inquiétez pas : les ateliers graphiques tel que fr:Wikipédia:Atelier graphique sont disponibles : on y trouve des gens qui peuvent réassembler une image numérisée en plusieurs fichiers. Un conseil : c'est beaucoup plus facile pour eux de réaliser cet assemblage si vous avez utilisé le bord de la glace du scanner pour caler le document de manière à ce que toutes les images résultant de la numérisation présentent le même angle. Mais, si vous ne pouvez y arriver, ils peuvent malgré tout généralement effectuer l'assemblage. Il est également recommandé de numériser avec une résolution relativement fine (en ne dépassant toutefois pas les 600 ppp dans le cas standard) ; il sera ainsi plus facile de masquer la jointure entre les images en réduisant la taille de la photo après assemblage.
Lorsque vous numérisez une illustration dans un livre il peut être utile de mettre une feuille de papier noir derrière la page numérisée. Cela permet d'empêcher le texte situé sur l'autre face d'apparaître en transparence. Si le résultat laisse apparaître malgré tout le texte du verso, cela peut parfois être corrigé en utilisant un logiciel éditeur d'images. Une technique qui marche assez bien pour les images en niveau de gris est détaillée dans Commons:Pearson Scott Foresman.
PNG contre JPEG[edit]
PNG est un format de fichier image sans perte d'information. Les formats GIF et JPEG (parfois appelé jpg qui est le raccourci DOS) peuvent ajouter des artefacts (approximation de compression qui enlaidit la photo). Le format GIF est généralement utilisé pour les animations tandis que JPEG et PNG sont préférés pour les photos. Dans la mesure où la plupart des scanners ne sont pas conçus pour numériser les films, concentrons nous sur les formats PNG et JPEG.
Le format PNG est sur la plupart du temps le format idéal, mais si l'image est vraiment grande (plus de 12,5 millions de pixels soit à peu près 4000x3000 pixels), le logiciel Wikimédia ne peut pas l'afficher et il vaut mieux passer au format JPEG. Une image PNG en vraies couleurs peut atteindre une taille vraiment importante et au-dessus de 15 MB, cela peut créer un problème. Des programmes tels que Optipng or PNGcrush permettent de diminuer la taille des fichiers PNG sans perte de qualité. Dans tous les cas, il vaut généralement mieux commencer par numériser dans un format sans perte tels que PNG, TIFF, ou si c'est possible BMP. Un fichier JPEG se traduit toujours par une perte de qualité et avec certains réglages on peut perdre une partie importante de l'information ; en le convertissant au format PNG les données perdues ne seront pas reconstituées. De plus, si vous modifiez un fichier JPEG, particulièrement si vous répétez cette manipulation, les artefacts vont commencer à s'accumuler. En démarrant avec un format sans perte, même si vous devez passez au format JPEG à la fin pour des raisons de taille, vous ne perdrez en qualité que ce qui ne peut être évité.
Dans les logiciels d'édition d'images, vous pouvez généralement choisir le taux de compression du fichier JPEG. Dans une échelle de 1 à 100 (100 correspondant à la meilleure qualite) il est préférable de ne pas descendre en dessous de 85 environ (et de conserver 100 à moins qu'un problème de taille vous oblige à compresser plus) ; il faut vérifier le fichier obtenu à la résolution maximale avant d'effectuer l'import pour être sûr qu'il est toujours correct. Cette ancienne version de Sadko.jpg, vue à pleine résolution montre des milliers de petits carrés ce qui est le résultat d'une qualité trop faible. La version courante fait deux fois sa taille mais évite ce problème.
Numérisation en blanc et noir, niveau de gris ou couleurs ?[edit]

Si votre image est en couleur, la réponse est évidemment qu'il faut numériser en couleur. Si l'image est en noir et blanc, la décision est un petit peu plus compliquée. Une image numérisée en noir et blanc n'est en général pas une bonne idée. Au contraire, la numérisation en niveaux de gris produit des courbes plus douces et génère un anticrénelage qui adoucit la pixellisation. Pourtant, chaque technique présente des avantages en fonction du contexte.
Niveaux de gris[edit]
Lorsque vous scannez une image à partir d'une reproduction (par exemple, la photocopie d'un journal), il est inutile de chercher à garder la texture du papier.
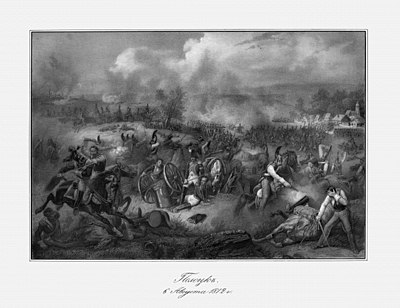
L'image ci-contre est scannée en niveaux de gris. Le contraste a été augmenté afin d'obtenir un fond blanc uni et afficher les lignes en noir pur. Il s'agit d'une gravure, et les lignes qui la composent sont relativement épaisses (les plus fines ont l'épaisseur d'une bille d'un stylo à bille ; elles sont visibles à l’œil nu si l'on regarde de près). Par conséquent, l'ajustement du contraste ne fait pas perdre de détails à l'image.

Couleur[edit]
Dans cette autre image, certaines lignes sont si fines qu'elles sont difficilement visibles à l’œil nu en gardant la taille d'origine. L'encre a un peu vieilli avec le temps et le papier est devenu un peu « âgé ». Certains détails des lignes très fines pourrait être perdus avec les différents traitements appliqués à l'image. D'autre part, l'encre et le papier utilisés ont un intérêt direct pour cette image. Il convient donc de la numériser en couleur pour ne perdre aucune nuance.
Conclusion[edit]
Dans le cas où vous hésitez entre les deux méthodes, essayez les deux et gardez celle qui vous satisfait le plus. Cependant, gardez à l'esprit qu'on peut toujours passer de la couleur aux niveaux de gris, mais qu'il est impossible de rétablir la couleur d'une image scannée en niveaux de gris. Dans le cas des documents rares ou précieux, il vaut mieux le faire en couleur.
Half-toning[edit]
Half-toned images are used in most modern printing. In them, an array of dots is spaced at even intervals, with the size of the dot determining how dark it is. Unfortunately, half-toning can look awful if you zoom in too far. Consider this image:
In the original, this was made by using engraving for the black lines, followed, as I understand it, by either hand-tinting or several additional plates for each colour. However, this version was clearly scanned from a modern book, and at full-view, all the dots that went into the half-toning are visible.
If possible, try to go to the original sources. This, of course, isn't always possible, so if your work is half-toned, but is still under a free licence, please do scan it for commons! Half-toning can be fixed with a little manipulation afterwards, and, even if the image ends up, by necessity, at a lowish resolution, it's still showing things that would otherwise be unavailable to Wikipedia projects.
"Remove moiré", or "descreen" functions of scanner software make a start towards fixing half-toning. Turn them on.
A half-toned image cannot have more detail than the spacing of the dots that make it up, so if your work is half-toned, it's best to manipulate it in a photo editing program afterwards. The easiest way is to first use the blur tool, which will smooth out the dots a bit, then scale it down a bit until the dots are no longer visible. In pure black-and-white half-toned images, however, you may be able to get away with just blurring it a bit, then using the sharpen tool and upping the contrast. You should probably downscale it a bit afterwards, but this can salvage a black and white half-toned image to good effect with practice.
Software is available from Cornell University and Picture elements to automatically fix black and white halftone images, if scanned at 600dpi.
Gravures, eaux-fortes, et autres documents similaires[edit]
Les gravures sont sans doute les œuvres d'art les plus faciles à numériser. Si vous avez accès à une bonne bibliothèque, vous pourrez trouver dans les journaux du XIXe siècle des gravures de très bonne qualité, souvent bien conservées et en grand nombre.
Il y a deux types de gravures.
Gravure faite à partir de lignes[edit]
Le premier type de gravure est réalisé avec des lignes individuelles, telle que cette petite gravure de Charles Dickens (taille originale : environ 5 cm).
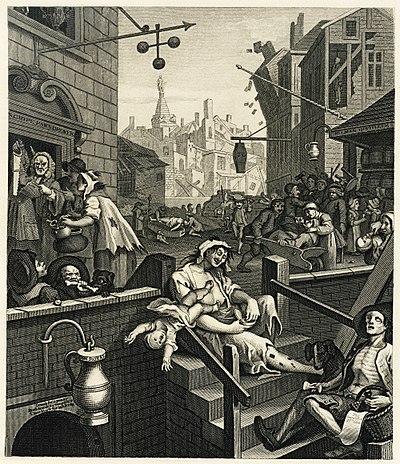
Cette technique est également utilisée pour des gravures beaucoup plus complexes, comme celle-ci :
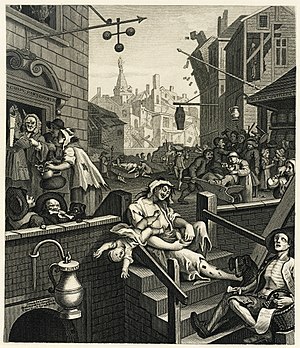
En regardant cette image de William Hogarth en pleine résolution, on voit que tout les détails et les ombres sont réalisés par des lignes très fines et des petites hachures. Cette image est en réalité une re-gravure par Samuel Davenport, réduite à environ 12cm x 16cm. Les petites lignes sont invisibles à l'oeil nu et se transforment en ombres.
Il s'agit sans doute du procédé le plus répandu de gravure en noir et blanc.
Eaux fortes[edit]
Regardons à présent cette image :
Techniquement, ce n'est pas une gravure mais une eau-forte.
Technically, this is actually not an engraving, but an etching. An acid-resistant coating was put over the plate, then areas were scratched away to allow acid to get at and texture the plate. The longer the acid is in contact, the rougher the plate's surface gets, and so the more ink it holds. By using several baths, changing what is covered as you go, you can create delicately-shaded works such as this one, with the shading made up of a sea of irregularly-shaped pits. Etching generally cannot get as much detail as an engraving proper, as a certain amount of randomness comes into play from the acid pitting the surface irregularly. An etching is inherently "noisy", with irregular dimpling of black and white, as it's altering how much "noise" there is in any one area that actually makes up the art.
This distinction matters to scanning: In a scan of an engraving proper, every line should be distinct at full resolution, unless the engraving is extremely large, but in an etching, the artist did not physically choose the *exact* texture that creates the colours or grayscale, so a slightly lower resolution is fine. You can upload files up to about 15 megabytes or more in size. (The recommendation that files be under 5 megabytes does not apply to complicated works of art that do not compress well, and engravings, etchings, and paintings generally don't.) For large engravings, you may well have to use this.
A good scan of engraving, etching, or similar should:
- Show every line that makes it up distinctly, if an engraving (If it's really large, though, say more than 3 ft / 1 metre wide, just try and get it so all important detail can be seen and all text can be read). In an etching, it's basically made out of noise/static/irregularly shaped pits, with the location not precisely chosen by the artist. Just scan them at a reasonably high resolution.
- If it's a black and white engraving, and you've decided not to show the paper texture, adjust the levels so that the background is smooth, pure white, and the ink (at least where there's plenty of it) is a nice dark black. If you're scanning in colour, still make sure the paper is reasonably light in colour, and black areas do not look washed out, but reasonably black. This will make it look far better when scaled down for viewing on Wikipedia and other projects.
- For colour engravings, see also the advice of the next section.
Note au sujet des gravures sur bois[edit]
Woodblock engravings, particularly from Victorian periodicals, often contain fine white lines that show the divisions between the woodblocks that were glued together to make the full image. (Example Image:Design for an Aesthetic theatrical poster.png is fairly cleanly divided into four smaller rectangles.) There are multiple views on whether it is best to edit the image to remove them or to keep them in for authenticity. Graphics labs, such as en:WP:GL/IMPROVE, Commons:Graphics village pump and Commons:Graphic Lab are probably the most useful places to go for restoration work; describing how to do extensive restoration work yourself is probably out of the scope of this tutorial.
Peintures, illustrations en couleurs et oeuvres similaires[edit]
The methods for scanning full-colour illustrations, paintings (however, see below in this case), and similar are not greatly different from engravings, but it's best to adjust the colours afterwards to make it look as much like the original as possible.
- Scan at a minimum of 300dpi.
- Using a graphics editing program, adjust the levels, brightness and contrast, and so on, until the colours are as similar to those in the actual picture as possible. Keep a copy of the untweaked scan, and compare it with the final version to make sure you haven't accidentally messed something up. Also, this was said in the general advice section already, but make sure your monitor is appropriately calibrated, as described in Commons:Image_guidelines#Your_Monitor - otherwise, what looks realistic to you and what looks realistic to everyone else will be different.
A warning about paintings: For paintings done on a canvas (e.g. most oil paintings, acrylics, and so on, in most cases, it's not going to be possible to get the original to a scanner, and, if the painting is old, it might damage it even if you could get it to one. If, however, it is possible, and damage is unlikely—e.g. a painting you've just made yourself, hence in good condition, note the texture of it. A little texture is fine, but if some parts stick out much more than a couple millimetres from the surface, you're probably best photographing it.
In many cases, though, you'll be scanning a painting from a modern reproduction. This can lead to mixed results. In lower-quality reproductions, you'll be dealing with #Half-toning, as described in the earlier section on it. Use the advice given there to attempt to ameliorate it. However, really good reproductions, as can be found in some high-quality art books may not have half-toning, or have it so fine that it doesn't matter except at the most ridiculously high of resolutions. In these cases, scan it at at least 300dpi then adjust it in a graphics program as described for scanning from an original painting.
As always, Graphics labs such as en:WP:GL/IMPROVE, Commons:Graphics village pump and Commons:Graphic Lab can assist you if you find this difficult. Also, check the copyright status first. Bridgeman Art Library v. Corel Corp. and similar rulings in other countries mean that, in most cases, if the original is in public domain, a copy is as well. However, note that the United Kingdom has unusually strict copyright laws that may protect a heavily-restored image produced there. If in doubt, Commons:Licensing attempts to explain the full rules related to copyright, and Commons:Village pump may be able to help you if you are still uncertain.
Recadrage[edit]
Try and leave a little whitespace around the image when you're scanning it in full. This makes sure you don't accidentally remove useful parts of the image, or (just as easy, I'm afraid) give the impression you have. Obviously, this may not be possible if the image goes right to the edge of the paper, but putting a piece of blank white paper behind it can help. Scan the image in multiple parts, if necessary—as mentioned in #General advice, support is available to stitch an image together from its parts.
When giving a detail from a larger image, try and trim it so that distracting details you do not intend to draw attention to are minimised in visual effect. For example:
This is a detail from a Punch cartoon—this Punch cartoon, in fact—that was being cropped for the English Wikipedia article on Gilbert and Sullivan As such, The main image of Sullivan, and the tiny W. S. Gilbert were the important parts. Part of someone who is probably F. C. Burnand can be seen in the upper left-hand corner, but the crop avoids showing his face, so it doesn't attract too much attention. This detail is also from the lower-right corner of the original, so it's fairly sharply cropped on the right and bottom to avoid including (most of) the black line that frames the image as a whole, as having a thick black line on only two sides of an image would unbalance it. Serendipitously, the tiny bit of the black line that got left in on the lower edge and the bit of Burnand's moustache in the upper left completes the frame, creating a nice, even rectangle.
Liens externes[edit]
- Trucs et astuces de numérisation
- Halftone scanning
- Numérisation : Trucs et astuces, manuels et techniques - liste de liens
- SANE FAQ - SANE (Scanner Access Now Easy) - API pour logiciel de scanner sous Linux comme XSANE


