Category:Photographs by Asurnipal-Kopswerk II
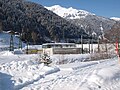
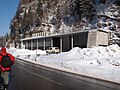
This category contains photographs of the "Kopswerk II" (power plant in the Montafon, Vorarlberg) in Austria, that were created and published by User:Asurnipal.
You can go to my page to read more (in German).
This category contains a collection of those pictures taken by User:Asurnipal. All images, unless otherwise stated on the specific image's page, are released under the license cc-by-sa-3.0 or cc-by-sa-4.0. Please check the image page to make sure. If you would like special permission to use, license, or purchase the images or prints of the images, or for use in any other fashion, or would simply like a copy of the original files, please contact me or email me first to ask (in english or german).
Note: While you are not required to do so by the license, please consider letting me know when you reuse one of my photograph images, as a courtesy.
Media in category "Photographs by Asurnipal-Kopswerk II"
The following 62 files are in this category, out of 62 total.
-
 Kops2-AngabeMaschine2.JPG 2,560 × 1,920; 988 KB
-
 Kops2-AngabeMaschine3.jpg 2,560 × 1,920; 1.33 MB
-
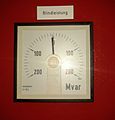 Kops2-Anzeige-Blindleistung.jpg 1,601 × 1,671; 139 KB
-
 Kops2-Anzeige-Maschine2.jpg 1,920 × 2,560; 435 KB
-
 Kops2-Anzeige-Polradspannung.jpg 1,524 × 1,899; 224 KB
-
 Kops2-Anzeige-Steuerwasserdruck.jpg 1,466 × 1,650; 232 KB
-
 Kops2-Beipassschieber-hydr-Kurzschluss-01.JPG 1,920 × 2,560; 1.06 MB
-
 Kops2-Beipassschieber-hydr-Kurzschluss-02.JPG 1,920 × 2,560; 1,007 KB
-
 Kops2-DuesenstockModell-01a.gif 2,560 × 1,920; 2.65 MB
-
 Kops2-DuesenstockModell-01b.JPG 2,560 × 1,920; 984 KB
-
 Kops2-DuesenstockModell-02.gif 2,560 × 1,920; 2.47 MB
-
 Kops2-DuesenstockModell-03.jpg 2,560 × 1,920; 1.15 MB
-
 Kops2-DuesenstockModell-04.JPG 2,560 × 1,920; 1,000 KB
-
 Kops2-DuesenstockModell-05.JPG 2,560 × 1,920; 915 KB
-
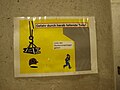 Kops2-Gefahrenhinweis.JPG 2,560 × 1,920; 1,017 KB
-
 Kops2-Hauptventil mit Fallgewicht-Pumpenzuleitung-Masch1-01.JPG 1,920 × 2,560; 401 KB
-
 Kops2-Hauptventil mit Fallgewicht-Pumpenzuleitung-Masch1-02.jpg 1,920 × 2,560; 437 KB
-
 Kops2-Hauptventil mit Fallgewicht-Pumpenzuleitung-Masch1-03.JPG 1,920 × 2,560; 499 KB
-
 Kops2-Hauptventil mit Fallgewicht-Pumpenzuleitung-Masch1-04.JPG 1,920 × 2,560; 426 KB
-
 Kops2-Hochspannungsleitung-6.UG-01.gif 2,552 × 1,625; 2.37 MB
-
 Kops2-Hochspannungsleitung-6.UG-02.gif 2,558 × 1,604; 2.26 MB
-
 Kops2-hydrSchmierungPumpen-6-UG-01.JPG 2,560 × 1,920; 1,012 KB
-
 Kops2-hydrSchmierungPumpen-6-UG-02.gif 1,920 × 2,560; 2.15 MB
-
 Kops2-Maschine1-KopfteilTurbine-EG-Kaverne-01.jpg 2,560 × 1,920; 1.29 MB
-
 Kops2-Maschine1-KopfteilTurbine-EG-Kaverne-02.jpg 1,920 × 2,560; 441 KB
-
 Kops2-Maschine1-Pumpengehaeuse-5.UG mit Ableitung ins Kopsbecken-01.JPG 2,560 × 1,920; 1.01 MB
-
 Kops2-Maschine1-Pumpengehaeuse-5.UG-01.JPG 2,560 × 1,920; 1.04 MB
-
 Kops2-Maschine1-Punpe mitBlick in5.UG zu Kupplung.JPG 1,920 × 2,560; 456 KB
-
 Kops2-Maschine3-Blick aufPumpe-5. ins 6.UG-01.JPG 2,560 × 1,920; 1,005 KB
-
 Kops2-Maschine3-Pumpe u Kupplung-5.UG-01.JPG 1,920 × 2,560; 661 KB
-
 Kops2-Maschine3-Pumpe u Kupplung-5.UG-02.JPG 1,920 × 2,560; 647 KB
-
 Kops2-MaschinenkavEG-Blick ins 6.UG.JPG 2,560 × 1,920; 957 KB
-
 Kops2-Modell-Maschinensatz-01.gif 1,920 × 2,560; 2.25 MB
-
 Kops2-ModellPumpenlaufrad-01.JPG 2,560 × 1,920; 946 KB
-
 Kops2-ModellPumpenlaufrad-02.JPG 2,560 × 1,920; 1,008 KB
-
 Kops2-Notfall-Tauchpumpe-01.gif 1,920 × 2,560; 2.03 MB
-
 Kops2-Notfall-Tauchpumpe-02.gif 1,920 × 2,560; 2.03 MB
-
 Kops2-Peltonrad-Modell.gif 2,560 × 1,920; 2.43 MB
-
 Kops2-SchaltanlABB-01.JPG 2,560 × 1,920; 921 KB
-
 Kops2-SchaltanlABB-02.JPG 2,560 × 1,920; 970 KB
-
 Kops2-SchaltanlABB-03.JPG 2,560 × 1,920; 982 KB
-
 Kops2-SchaltanlABB-04.JPG 2,560 × 1,920; 999 KB
-
 Kops2-SchaltanlABB-05.JPG 2,560 × 1,920; 1,021 KB
-
 Kops2-SF6-SchaltAnl-Rifa-01.JPG 2,560 × 1,920; 1.02 MB
-
 Kops2-SF6-SchaltAnl-Rifa-02.JPG 2,560 × 1,920; 1.02 MB
-
 Kops2-SpeisungPumpeMasch3.JPG 2,560 × 1,920; 1,018 KB
-
 Kops2-Werkzeugkasten-Revision-6.UG-01.JPG 1,920 × 2,560; 419 KB
-
 Kops2-Werkzeugkasten-Revision-6.UG-02.JPG 1,920 × 2,560; 329 KB
-
 Kops2-Werkzeugkasten-Revision-6.UG-03.JPG 1,920 × 2,560; 410 KB
-
 Kops2-ZugangRifa-01-Stollen-Kaverne-02.gif 1,920 × 2,560; 1.56 MB
-
 Kops2-ZugangRifa-01-Stollen-Kaverne.JPG 2,560 × 1,920; 981 KB
-
 Kops2-ZugangRifa-01.JPG 2,560 × 1,920; 1.06 MB
-
 Kops2-ZugangRifa-01a-Stollen-RifaausgHl.Barbara.gif 1,920 × 2,560; 2.49 MB
-
 Kops2-ZugangRifa-01b-Stollen-RifaausgHl.Barbara.gif 986 × 1,623; 838 KB
-
 Kops2-ZugangRifa-01c-Stollen-RifaausgHl.Barbara.gif 1,920 × 2,560; 2.59 MB
-
 Kops2-ZugangRifa-02.JPG 2,560 × 1,920; 1.05 MB
-
 Kops2-ZugangRifa-03-Stollen-Kaverne.JPG 2,560 × 1,920; 992 KB
-
 Kops2FeldankerDecke und Kranbahn-01.JPG 2,560 × 1,920; 1.1 MB
-
 Kops2FeldankerDecke und Kranbahn-04.JPG 2,560 × 1,920; 1.05 MB
-
 Kops2FeldankerDecke und Kranbahn-05.JPG 2,560 × 1,920; 1.07 MB
-
 Kops2FeldankerDecke-02.JPG 1,920 × 2,560; 1,003 KB
-
 Kops2FeldankerKranbahn-01.gif 1,920 × 2,560; 2.03 MB


