User:Canoe1967/Montages
Jump to navigation
Jump to search

Ipswich montage 2.jpg 
Montage process
[edit]- Create an transparency (alpha) and paste the original image to it.
- Use a free form select tool to cut out the parts you don't want to keep.
- Save often.
- Open the background image and then paste the alpha image onto it.
- There may be easier ways that I haven't found yet.
- Be sure to attribute works of others correctly.
-
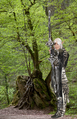
 Original image
 -
 Alpha background and bow extended
 -
 Backgrond one
 -
 Result one
 -
 Backgrond two
 -
 Result two
 -
 Backgrond three
 -
 Result three


Collage process
[edit]
Gimp takes very little time to learn. I will list the steps I did with File:Ipswich montage 2.jpg It may look long and complex but once you get used to the flow then it is easier.
- Download all the images to one working folder
- Open the top image first
- Expand the canvas to larger than the complete collage you intend to make
- Image menu --> canvas size
- Make it really tall and a little wider than a final size
- Drag the top image around in the canvas preview window if needed
- Opened another image as a 'layer'
- File --> open as layer
- Adjust the new image layer
- Use the move tool from the toolbox to move it, gaps or overlap can be fixed when creating borders later but keep them tight
- Scale the layer to fit if needed, Layer menu on the top toolbar --> scale layer
- Use the rectangle select tool from the top left of the toolbox, select the crop area with mouse, then Layer menu --> crop to selection
- Anchor/merge layer, Layer menu --> anchor or merge
- Repeat until all images are in place without borders
- Create borders after all layers are anchored/merged
- Use the select tool to select thin rectangular borders to crop overlap and fill gaps
- Edit menu --> fill selection with BG or FG color. (Background/Foreground are white and black as default)
- Crop the final collage if some images stick out or have top/bottom/side gaps
- See File:Ipswich montage 2.jpg for one method of attribution.
Notes
[edit]- Copy all of this thread to a .txt file or screen shot
- Export often as collage 1.0.png, collage 1.1.png, collage 1.3.png. File --> Export
- Edit menu --> undo is handy and has lots of backsteps
- Export often (repeated because it is handy for corrections/tweaks)
- Layers are tricky
- Practice with 2-3 layers or small images first if needed
- If they won't anchor/merge you may be on the wrong layer
- Layer menu --> stack, select top/bottom/previous/next, then anchor/merge, the bottom layer won't merge
- You don't need to anchor any layers until the final but it may be easiest when starting as it can be hard to keep track of which layer you are editing
- The top of the image window shows size and layer count
- X/Y link
- In the scale and canvas size windows there is a little chain icon of three links
- Close or break the links to lock changes to height/width (x/y)
- The toolbox has a measuring tool that is handy for scaling, measure the space you want the image to fit and then scale the layer to that pixel size
- Add more notes here

