Category:Views from Hong Kong Tramways in Hong Kong Island North
Jump to navigation
Jump to search
Media in category "Views from Hong Kong Tramways in Hong Kong Island North"
The following 200 files are in this category, out of 529 total.
(previous page) (next page)-

-
-

-
-

-

-

-
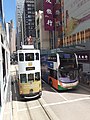
 HK CWB 香港電車 Tramway tour view 銅鑼灣 Causeway Bay 軒尼詩道 454 Hennessy Road May 2024 R12S.jpg 4,000 × 3,000; 3.37 MB
-

-

-

-

-

-

-

-

-
 HK Tram 105 tour view Hong Kong Island North July 2020 SS2 03.jpg 4,128 × 3,096; 4.19 MB
-
 HK Tram 105 tour view Hong Kong Island North July 2020 SS2 04.jpg 2,576 × 1,932; 1.29 MB
-
 HK Tram 105 tour view Hong Kong Island North July 2020 SS2 05.jpg 2,576 × 1,932; 1.22 MB
-
 HK Tram 105 tour view Hong Kong Island North July 2020 SS2 06.jpg 2,576 × 1,932; 1.15 MB
-
 HK Tram 105 tour view Hong Kong Island North July 2020 SS2 07.jpg 2,576 × 1,932; 995 KB
-
 HK Tram 105 tour view Hong Kong Island North July 2020 SS2 08.jpg 2,576 × 1,932; 1.15 MB
-
 HK Tram 105 tour view Hong Kong Island North July 2020 SS2 09.jpg 2,576 × 1,932; 1.26 MB
-
 HK Tram 105 tour view Hong Kong Island North July 2020 SS2 10.jpg 4,128 × 3,096; 3.31 MB
-
 HK Tram 105 tour view Hong Kong Island North July 2020 SS2 11.jpg 4,128 × 3,096; 3.97 MB
-
 HK Tram 105 tour view Hong Kong Island North July 2020 SS2 12.jpg 2,576 × 1,932; 1.19 MB
-
 HK Tram 105 tour view Hong Kong Island North July 2020 SS2 13.jpg 2,576 × 1,932; 945 KB
-
 HK Tram 105 tour view Hong Kong Island North July 2020 SS2 14.jpg 2,576 × 1,932; 1.08 MB
-
 HK Tram 105 tour view Hong Kong Island North July 2020 SS2 17.jpg 3,264 × 2,448; 2.31 MB
-
 HK Tram 105 tour view Hong Kong Island North July 2020 SS2 18.jpg 3,096 × 4,128; 3.32 MB
-
 HK Tram 105 tour view Hong Kong Island North July 2020 SS2 19.jpg 3,096 × 4,128; 3.32 MB
-
 HK Tram 105 tour view Hong Kong Island North July 2020 SS2 20.jpg 4,128 × 3,096; 3.24 MB
-
 HK Tram 105 tour view Hong Kong Island North July 2020 SS2 21.jpg 4,128 × 3,096; 3.96 MB
-
 HK Tram 105 tour view Hong Kong Island North July 2020 SS2 22.jpg 4,128 × 3,096; 3.7 MB
-
 HK Tram 105 tour view Hong Kong Island North July 2020 SS2 23.jpg 4,128 × 3,096; 4.23 MB
-
 HK Tram 105 tour view Hong Kong Island North July 2020 SS2 24.jpg 4,128 × 3,096; 4.89 MB
-
 HK Tram 105 tour view Hong Kong Island North July 2020 SS2 25.jpg 2,576 × 1,932; 1.1 MB
-
 HK Tram 105 tour view Hong Kong Island North July 2020 SS2 26.jpg 2,576 × 1,932; 1.05 MB
-
 HK Tram 105 tour view Hong Kong Island North July 2020 SS2 27.jpg 2,576 × 1,932; 1.07 MB
-
 HK Tram 105 tour view Hong Kong Island North July 2020 SS2 28.jpg 1,932 × 2,576; 1.06 MB
-
 HK Tram 105 tour view Hong Kong Island North July 2020 SS2 29.jpg 2,576 × 1,932; 1.45 MB
-
 HK Tram 105 tour view Hong Kong Island North July 2020 SS2 30.jpg 2,576 × 1,932; 1.38 MB
-
 HK Tram 105 tour view Hong Kong Island North July 2020 SS2 31.jpg 2,576 × 1,932; 1.39 MB
-
 HK Tram 105 tour view Hong Kong Island North July 2020 SS2 32.jpg 2,576 × 1,932; 1.48 MB
-
 HK Tram 105 tour view Hong Kong Island North July 2020 SS2 33.jpg 1,932 × 2,576; 1.43 MB
-
 HK Tram 105 tour view Hong Kong Island North July 2020 SS2 34.jpg 1,932 × 2,576; 1.33 MB
-
 HK Tram 105 tour view Hong Kong Island North July 2020 SS2 35.jpg 2,576 × 1,932; 1.21 MB
-
 HK Tram 105 tour view Hong Kong Island North July 2020 SS2 36.jpg 3,096 × 4,128; 4.28 MB
-
 HK Tram 105 tour view Hong Kong Island North July 2020 SS2 37.jpg 4,128 × 3,096; 3.22 MB
-
 HK Tram 105 tour view Hong Kong Island North July 2020 SS2 38.jpg 4,128 × 3,096; 3.19 MB
-
 HK Tram 105 tour view Hong Kong Island North July 2020 SS2 39.jpg 4,128 × 3,096; 4.09 MB
-
 HK Tram 105 tour view Hong Kong Island North July 2020 SS2 40.jpg 4,128 × 3,096; 3.93 MB
-
 HK Tram 105 tour view Hong Kong Island North July 2020 SS2 41.jpg 4,128 × 3,096; 3.63 MB
-
 HK Tram 105 tour view Hong Kong Island North July 2020 SS2 42.jpg 4,128 × 3,096; 3.44 MB
-
 HK Tram 105 tour view Hong Kong Island North July 2020 SS2 43.jpg 4,128 × 3,096; 3.55 MB
-
 HK Tram 105 tour view Hong Kong Island North July 2020 SS2 44.jpg 4,128 × 3,096; 3.74 MB
-
 HK Tram 105 tour view Hong Kong Island North July 2020 SS2 45.jpg 4,128 × 3,096; 3.67 MB
-
 HK Tram 105 tour view Hong Kong Island North July 2020 SS2 46.jpg 4,128 × 3,096; 3.61 MB
-
 HK Tram 105 tour view Hong Kong Island North July 2020 SS2 47.jpg 4,128 × 3,096; 3.47 MB
-
 HK Tram 105 tour view Hong Kong Island North July 2020 SS2 48.jpg 4,128 × 3,096; 3.49 MB
-
 HK Tram 105 tour view Hong Kong Island North July 2020 SS2 49.jpg 4,128 × 3,096; 3.89 MB
-
 HK tram 112 tour view AM Admiralty Queensway October 2021 SS2 01.jpg 4,128 × 3,096; 5.06 MB
-
 HK tram 112 tour view AM Admiralty Queensway October 2021 SS2 02.jpg 4,128 × 3,096; 3.54 MB
-
 HK tram 112 tour view AM Admiralty Queensway October 2021 SS2 03.jpg 4,128 × 3,096; 3.7 MB
-
 HK tram 112 tour view AM Admiralty Queensway October 2021 SS2 04.jpg 3,096 × 4,128; 3.38 MB
-
 HK tram 112 tour view AM Admiralty Queensway October 2021 SS2 05.jpg 4,128 × 3,096; 4.24 MB
-
 HK tram 112 tour view AM Admiralty Queensway October 2021 SS2 06.jpg 2,576 × 1,932; 1.45 MB
-
 HK tram 112 tour view AM Admiralty Queensway October 2021 SS2 07.jpg 2,576 × 1,932; 1.27 MB
-
 HK tram 112 tour view AM Admiralty Queensway October 2021 SS2 08.jpg 4,128 × 3,096; 4.89 MB
-
 HK tram 112 tour view AM Admiralty Queensway October 2021 SS2 09.jpg 2,576 × 1,932; 1.35 MB
-
 HK tram 112 tour view AM Admiralty Queensway October 2021 SS2 10.jpg 3,096 × 4,128; 3.48 MB
-
 HK tram 112 tour view AM Admiralty Queensway October 2021 SS2 11.jpg 2,576 × 1,932; 1.31 MB
-
 HK tram 112 tour view AM Admiralty Queensway October 2021 SS2 12.jpg 2,576 × 1,932; 1.18 MB
-
 HK tram 112 tour view Central Des Voeux Road Central October 2021 SS2 01.jpg 4,128 × 3,096; 3.29 MB
-
 HK tram 112 tour view Central Des Voeux Road Central October 2021 SS2 02.jpg 4,128 × 3,096; 3.4 MB
-
 HK tram 112 tour view Central Des Voeux Road Central October 2021 SS2 03.jpg 4,128 × 3,096; 3.51 MB
-
 HK tram 112 tour view Central Des Voeux Road Central October 2021 SS2 04.jpg 4,128 × 3,096; 3.43 MB
-
 HK tram 112 tour view Central Des Voeux Road Central October 2021 SS2 05.jpg 4,128 × 3,096; 3.31 MB
-
 HK tram 112 tour view Central Des Voeux Road Central October 2021 SS2 06.jpg 4,128 × 3,096; 3.48 MB
-
 HK tram 112 tour view Central Des Voeux Road Central October 2021 SS2 07.jpg 4,128 × 3,096; 4.02 MB
-
 HK tram 112 tour view Central Des Voeux Road Central October 2021 SS2 08.jpg 4,128 × 3,096; 3.44 MB
-
 HK tram 112 tour view Central Des Voeux Road Central October 2021 SS2 09.jpg 4,128 × 3,096; 3.03 MB
-
 HK tram 112 tour view Central Des Voeux Road Central October 2021 SS2 10.jpg 4,128 × 3,096; 3.53 MB
-
 HK tram 112 tour view Central Des Voeux Road Central October 2021 SS2 11.jpg 4,128 × 3,096; 3.74 MB
-
 HK tram 112 tour view Central Des Voeux Road Central October 2021 SS2 12.jpg 4,128 × 3,096; 3.31 MB
-
 HK tram 112 tour view Central Des Voeux Road Central October 2021 SS2 13.jpg 4,128 × 3,096; 3.61 MB
-
 HK tram 112 tour view Central Des Voeux Road Central October 2021 SS2 14.jpg 4,128 × 3,096; 3.97 MB
-
 HK tram 112 tour view Central Des Voeux Road Central October 2021 SS2 15.jpg 4,128 × 3,096; 3.97 MB
-
 HK tram 112 tour view Central Des Voeux Road Central October 2021 SS2 16.jpg 4,128 × 3,096; 3.65 MB
-
 HK tram 112 tour view Central Des Voeux Road Central October 2021 SS2 17.jpg 4,128 × 3,096; 3.42 MB
-
 HK tram 112 tour view Central Des Voeux Road Central October 2021 SS2 18.jpg 2,576 × 1,932; 950 KB
-
 HK tram 112 tour view Central Des Voeux Road Central October 2021 SS2 19.jpg 3,096 × 4,128; 2.41 MB
-
 HK tram 112 tour view Central Des Voeux Road Central October 2021 SS2 20.jpg 2,576 × 1,932; 1 MB
-
 HK tram 112 tour view Central Des Voeux Road Central October 2021 SS2 21.jpg 4,128 × 3,096; 3.17 MB
-
 HK tram 112 tour view CWB Causeway Bay Hennessy Road October 2021 SS2 01.jpg 4,128 × 3,096; 3.35 MB
-
 HK tram 112 tour view CWB Causeway Bay Hennessy Road October 2021 SS2 02.jpg 4,128 × 3,096; 3.54 MB
-
 HK tram 112 tour view CWB Causeway Bay Hennessy Road October 2021 SS2 03.jpg 4,128 × 3,096; 4.06 MB
-
 HK tram 112 tour view CWB Causeway Bay Hennessy Road October 2021 SS2 04.jpg 2,576 × 1,932; 1.61 MB
-
 HK tram 112 tour view CWB Causeway Bay Hennessy Road October 2021 SS2 05.jpg 4,128 × 3,096; 3.38 MB
-
 HK tram 112 tour view CWB Causeway Bay Hennessy Road October 2021 SS2 06.jpg 4,128 × 3,096; 3.73 MB
-
 HK tram 112 tour view CWB Causeway Bay Hennessy Road October 2021 SS2 07.jpg 4,128 × 3,096; 3.69 MB
-
 HK tram 112 tour view CWB Causeway Bay Hennessy Road October 2021 SS2 08.jpg 2,576 × 1,932; 1.23 MB
-
 HK tram 112 tour view CWB Causeway Bay Hennessy Road October 2021 SS2 09.jpg 2,576 × 1,932; 1.42 MB
-
 HK tram 112 tour view CWB Causeway Bay Hennessy Road October 2021 SS2 10.jpg 2,576 × 1,932; 1.03 MB
-
 HK tram 112 tour view CWB Causeway Bay Hennessy Road October 2021 SS2 11.jpg 2,576 × 1,932; 1.16 MB
-
 HK tram 112 tour view CWB Causeway Bay Hennessy Road October 2021 SS2 12.jpg 2,576 × 1,932; 1.07 MB
-
 HK tram 112 tour view WC Wan Chai Hennessy Road Johnston Road October 2021 SS2 01.jpg 2,576 × 1,932; 1.23 MB
-
 HK tram 112 tour view WC Wan Chai Hennessy Road Johnston Road October 2021 SS2 02.jpg 2,576 × 1,932; 1.24 MB
-
 HK tram 112 tour view WC Wan Chai Johnston Road O'Brien Road October 2021 SS2 01.jpg 3,096 × 4,128; 3.72 MB
-
 HK tram 112 tour view WC Wan Chai Johnston Road O'Brien Road October 2021 SS2 02.jpg 4,128 × 3,096; 5.07 MB
-
 HK tram 112 tour view WC Wan Chai Johnston Road October 2021 SS2 08.jpg 4,128 × 3,096; 3.6 MB
-
 HK tram 112 tour view WC Wan Chai Johnston Road October 2021 SS2 09.jpg 4,128 × 3,096; 3.35 MB
-
 HK tram 112 tour view WC Wan Chai Johnston Road October 2021 SS2 10.jpg 4,128 × 3,096; 3.6 MB
-
 HK tram 112 tour view WC Wan Chai Johnston Road October 2021 SS2 11.jpg 4,128 × 3,096; 3.38 MB
-
 HK tram 112 tour view WC Wan Chai Johnston Road October 2021 SS2 12.jpg 4,128 × 3,096; 3.55 MB
-
 HK tram 112 tour view WC Wan Chai Johnston Road October 2021 SS2 13.jpg 4,128 × 3,096; 4.08 MB
-
 HK tram 112 tour view WC Wan Chai Johnston Road October 2021 SS2 14.jpg 4,128 × 3,096; 3.78 MB
-
 HK tram 112 tour view WC Wan Chai Johnston Road October 2021 SS2 15.jpg 4,128 × 3,096; 4.46 MB
-
 HK tram 112 tour view WC Wan Chai Johnston Road October 2021 SS2 16.jpg 3,096 × 4,128; 3.87 MB
-
 HK tram 112 tour view WC Wan Chai Johnston Road Southorn Playground October 2021 SS2 01.jpg 4,128 × 3,096; 5.07 MB
-
 HK tram 112 tour view WC Wan Chai Johnston Road Southorn Playground October 2021 SS2 02.jpg 4,128 × 3,096; 5.52 MB
-
 HK tram 112 tour view WC Wan Chai Johnston Road Southorn Playground October 2021 SS2 03.jpg 4,128 × 3,096; 5.03 MB
-
 HK tram 12 tour view Hong Kong Inland North July 2020 SS2 25.jpg 3,096 × 4,128; 3.43 MB
-
 HK tram 174 tour view Wan Chai Hennessy Road December 2021 SS2 001.jpg 3,264 × 2,448; 3.02 MB
-
 HK tram 174 tour view Wan Chai Hennessy Road December 2021 SS2 002.jpg 2,448 × 3,264; 3.08 MB
-
 HK tram 174 tour view Wan Chai Hennessy Road December 2021 SS2 003.jpg 3,264 × 2,448; 3.95 MB
-
 HK tram 174 tour view Wan Chai Hennessy Road December 2021 SS2 004.jpg 3,264 × 2,448; 2.91 MB
-
 HK tram 174 tour view Wan Chai Hennessy Road December 2021 SS2 005.jpg 2,448 × 3,264; 3.06 MB
-
 HK tram 174 tour view 中環 Central 德輔道中 Des Voeux Road Central December 2021 SS2 001.jpg 4,000 × 3,000; 4.09 MB
-
 HK tram 174 tour view 中環 Central 德輔道中 Des Voeux Road Central December 2021 SS2 002.jpg 4,000 × 3,000; 4.13 MB
-
 HK tram 174 tour view 中環 Central 德輔道中 Des Voeux Road Central December 2021 SS2 003.jpg 4,000 × 3,000; 4.48 MB
-
 HK tram 174 tour view 中環 Central 德輔道中 Des Voeux Road Central December 2021 SS2 004.jpg 4,000 × 3,000; 5.14 MB
-
 HK tram 174 tour view 中環 Central 德輔道中 Des Voeux Road Central December 2021 SS2 005.jpg 3,264 × 2,448; 3.59 MB
-
 HK tram 174 tour view 中環 Central 德輔道中 Des Voeux Road Central December 2021 SS2 006.jpg 3,264 × 2,448; 3.43 MB
-
 HK tram 174 tour view 中環 Central 德輔道中 Des Voeux Road Central December 2021 SS2 007.jpg 3,264 × 2,448; 3.47 MB
-
 HK tram 174 tour view 中環 Central 德輔道中 Des Voeux Road Central December 2021 SS2 008.jpg 3,264 × 2,448; 3.7 MB
-
 HK tram 174 tour view 中環 Central 德輔道中 Des Voeux Road Central December 2021 SS2 009.jpg 3,000 × 4,000; 4.62 MB
-
 HK tram 174 tour view 中環 Central 德輔道中 Des Voeux Road Central December 2021 SS2 010.jpg 4,000 × 3,000; 5.41 MB
-
 HK tram 174 tour view 中環 Central 德輔道中 Des Voeux Road Central December 2021 SS2 011.jpg 3,000 × 4,000; 4.21 MB
-
 HK tram 174 tour view 中環 Central 德輔道中 Des Voeux Road Central December 2021 SS2 012.jpg 4,000 × 3,000; 4.74 MB
-
 HK tram 174 tour view 中環 Central 德輔道中 Des Voeux Road Central December 2021 SS2 013.jpg 4,000 × 3,000; 5.03 MB
-
 HK tram 174 tour view 中環 Central 德輔道中 Des Voeux Road Central December 2021 SS2 014.jpg 4,000 × 3,000; 3.69 MB
-
 HK tram 174 tour view 中環 Central 德輔道中 Des Voeux Road Central December 2021 SS2 015.jpg 4,000 × 3,000; 4.45 MB
-
 HK tram 174 tour view 中環 Central 德輔道中 Des Voeux Road Central December 2021 SS2 016.jpg 4,000 × 3,000; 4.25 MB
-
 HK tram 174 tour view 中環 Central 德輔道中 Des Voeux Road Central December 2021 SS2 017.jpg 4,000 × 3,000; 5.14 MB
-
 HK tram 174 tour view 中環 Central 德輔道中 Des Voeux Road Central December 2021 SS2 018.jpg 4,000 × 3,000; 4.86 MB
-
 HK tram 174 tour view 中環 Central 德輔道中 Des Voeux Road Central December 2021 SS2 019.jpg 4,000 × 3,000; 3.99 MB
-
 HK tram 174 tour view 中環 Central 德輔道中 Des Voeux Road Central December 2021 SS2 020.jpg 4,000 × 3,000; 4.45 MB
-
 HK tram 174 tour view 中環 Central 德輔道中 Des Voeux Road Central December 2021 SS2 021.jpg 4,000 × 3,000; 4.82 MB
-
 HK tram 174 tour view 中環 Central 德輔道中 Des Voeux Road Central December 2021 SS2 022.jpg 3,264 × 2,448; 3.16 MB
-
 HK tram 174 tour view 中環 Central 德輔道中 Des Voeux Road Central December 2021 SS2 023.jpg 3,264 × 2,448; 3.21 MB
-
 HK tram 174 tour view 中環 Central 德輔道中 Des Voeux Road Central December 2021 SS2 024.jpg 3,264 × 2,448; 2.55 MB
-
 HK tram 174 tour view 中環 Central 德輔道中 Des Voeux Road Central December 2021 SS2 025.jpg 3,000 × 4,000; 4.87 MB
-
 HK tram 174 tour view 中環 Central 德輔道中 Des Voeux Road Central December 2021 SS2 026.jpg 4,000 × 3,000; 5.83 MB
-
 HK tram 174 tour view 中環 Central 德輔道中 Des Voeux Road Central December 2021 SS2 027.jpg 3,000 × 4,000; 4.74 MB
-
 HK tram 174 tour view 中環 Central 德輔道中 Des Voeux Road Central December 2021 SS2 028.jpg 3,000 × 4,000; 4.92 MB
-
 HK tram 174 tour view 中環 Central 德輔道中 Des Voeux Road Central December 2021 SS2 029.jpg 4,000 × 3,000; 4.67 MB
-
 HK tram 174 tour view 中環 Central 德輔道中 Des Voeux Road Central December 2021 SS2 030.jpg 4,000 × 3,000; 4.57 MB
-
 HK tram 174 tour view 中環 Central 德輔道中 Des Voeux Road Central December 2021 SS2 031.jpg 4,000 × 3,000; 4.04 MB
-
 HK tram 174 tour view 中環 Central 德輔道中 Des Voeux Road Central December 2021 SS2 032.jpg 4,000 × 3,000; 4.53 MB
-
 HK tram 174 tour view 中環 Central 德輔道中 Des Voeux Road Central December 2021 SS2 033.jpg 3,264 × 2,448; 3.24 MB
-
 HK tram 174 tour view 中環 Central 德輔道中 Des Voeux Road Central December 2021 SS2 034.jpg 3,264 × 2,448; 3.22 MB
-
 HK tram 174 tour view 中環 Central 德輔道中 Des Voeux Road Central December 2021 SS2 035.jpg 3,264 × 2,448; 3.2 MB
-
 HK tram 174 tour view 中環 Central 德輔道中 Des Voeux Road Central December 2021 SS2 036.jpg 3,264 × 2,448; 3.52 MB
-
 HK tram 174 tour view 中環 Central 德輔道中 Des Voeux Road Central December 2021 SS2 037.jpg 2,448 × 3,264; 3.19 MB
-
 HK tram 174 tour view 中環 Central 德輔道中 Des Voeux Road Central December 2021 SS2 038.jpg 2,448 × 3,264; 3.31 MB
-
 HK tram 174 tour view 中環 Central 德輔道中 Des Voeux Road Central December 2021 SS2 039.jpg 2,448 × 3,264; 3.48 MB
-
 HK tram 174 tour view 中環 Central 德輔道中 Des Voeux Road Central December 2021 SS2 040.jpg 2,448 × 3,264; 3.09 MB
-
 HK tram 174 tour view 灣仔 Wan Chai 莊士頓道 Johnston Road December 2021 SS2 001.jpg 3,264 × 2,448; 3.35 MB
-
 HK tram 174 tour view 灣仔 Wan Chai 莊士頓道 Johnston Road December 2021 SS2 002.jpg 3,264 × 2,448; 3.49 MB
-
 HK tram 174 tour view 灣仔 Wan Chai 莊士頓道 Johnston Road December 2021 SS2 003.jpg 3,264 × 2,448; 3.51 MB
-
 HK tram 174 tour view 灣仔 Wan Chai 莊士頓道 Johnston Road December 2021 SS2 004.jpg 3,264 × 2,448; 4.1 MB
-
 HK tram 174 tour view 灣仔 Wan Chai 莊士頓道 Johnston Road December 2021 SS2 005.jpg 3,264 × 2,448; 2.74 MB
-
 HK tram 174 tour view 灣仔 Wan Chai 莊士頓道 Johnston Road December 2021 SS2 006.jpg 3,264 × 2,448; 4.04 MB
-
 HK tram 174 tour view 灣仔 Wan Chai 莊士頓道 Johnston Road December 2021 SS2 007.jpg 3,264 × 2,448; 3.65 MB
-
 HK tram 174 tour view 灣仔 Wan Chai 莊士頓道 Johnston Road December 2021 SS2 008.jpg 2,448 × 3,264; 3.47 MB
-
 HK tram 174 tour view 灣仔 Wan Chai 莊士頓道 Johnston Road December 2021 SS2 009.jpg 3,000 × 4,000; 6.46 MB
-
 HK tram 174 tour view 灣仔 Wan Chai 莊士頓道 Johnston Road December 2021 SS2 010.jpg 3,264 × 2,448; 3.48 MB
-
 HK tram 174 tour view 灣仔 Wan Chai 莊士頓道 Johnston Road December 2021 SS2 011.jpg 3,264 × 2,448; 3.25 MB
-
 HK tram 174 tour view 灣仔 Wan Chai 莊士頓道 Johnston Road December 2021 SS2 012.jpg 3,264 × 2,448; 4.26 MB
-
 HK tram 174 tour view 灣仔 Wan Chai 莊士頓道 Johnston Road December 2021 SS2 013.jpg 3,264 × 2,448; 3.79 MB
-
 HK tram 174 tour view 灣仔 Wan Chai 莊士頓道 Johnston Road December 2021 SS2 014.jpg 3,264 × 2,448; 3.32 MB
-
 HK tram 174 tour view 灣仔 Wan Chai 莊士頓道 Johnston Road December 2021 SS2 015.jpg 3,264 × 2,448; 3.97 MB
-
 HK tram 174 tour view 灣仔 Wan Chai 莊士頓道 Johnston Road December 2021 SS2 016.jpg 3,264 × 2,448; 4.03 MB
-
 HK tram 174 tour view 灣仔 Wan Chai 莊士頓道 Johnston Road December 2021 SS2 017.jpg 3,264 × 2,448; 3.04 MB
-
 HK tram 174 tour view 灣仔 Wan Chai 莊士頓道 Johnston Road December 2021 SS2 018.jpg 3,264 × 2,448; 3.49 MB
-
 HK tram 174 tour view 灣仔 Wan Chai 莊士頓道 Johnston Road December 2021 SS2 019.jpg 3,264 × 2,448; 3.69 MB
-
 HK tram 174 tour view 灣仔 Wan Chai 莊士頓道 Johnston Road December 2021 SS2 020.jpg 3,264 × 2,448; 3.72 MB
-
 HK tram 174 tour view 灣仔 Wan Chai 莊士頓道 Johnston Road December 2021 SS2 021.jpg 3,264 × 2,448; 3.28 MB
-
 HK tram 174 tour view 灣仔 Wan Chai 莊士頓道 Johnston Road December 2021 SS2 022.jpg 3,264 × 2,448; 3.38 MB
-
 HK tram 174 tour view 灣仔 Wan Chai 莊士頓道 Johnston Road December 2021 SS2 023.jpg 3,264 × 2,448; 3.22 MB
-
 HK tram 174 tour view 灣仔 Wan Chai 莊士頓道 Johnston Road December 2021 SS2 024.jpg 3,264 × 2,448; 3.6 MB
-
 HK tram 174 tour view 灣仔 Wan Chai 莊士頓道 Johnston Road December 2021 SS2 025.jpg 3,264 × 2,448; 3.54 MB
-
 HK tram 174 tour view 灣仔 Wan Chai 莊士頓道 Johnston Road December 2021 SS2 026.jpg 3,264 × 2,448; 3.15 MB
-
 HK tram 174 tour view 灣仔 Wan Chai 莊士頓道 Johnston Road December 2021 SS2 027.jpg 3,264 × 2,448; 4 MB
-
 HK tram 174 tour view 灣仔 Wan Chai 莊士頓道 Johnston Road December 2021 SS2 028.jpg 3,264 × 2,448; 3.77 MB
-
 HK tram 174 tour view 灣仔 Wan Chai 莊士頓道 Johnston Road December 2021 SS2 029.jpg 3,264 × 2,448; 3.58 MB
-
 HK tram 174 tour view 灣仔 Wan Chai 莊士頓道 Johnston Road December 2021 SS2 030.jpg 3,264 × 2,448; 3.27 MB
-
 HK tram 174 tour view 灣仔 Wan Chai 莊士頓道 Johnston Road December 2021 SS2 031.jpg 3,264 × 2,448; 2.51 MB
-
 HK tram 174 tour view 灣仔 Wan Chai 莊士頓道 Johnston Road December 2021 SS2 032.jpg 3,264 × 2,448; 3.17 MB


