Category:The Illustrated London News 1879
Jump to navigation
Jump to search

Media in category "The Illustrated London News 1879"
The following 69 files are in this category, out of 69 total.
-
 ILN 1879, p. 463.jpg 1,465 × 2,165; 657 KB
-
 ILN 1879, p. 464.jpg 2,165 × 1,465; 677 KB
-
 ILN 1879, p. 465.jpg 1,465 × 2,165; 393 KB
-
 Bay and Town of Funchal, Madeira, ILN 1879 (coloured).jpg 512 × 257; 44 KB
-
 Bay and Town of Funchal, Madeira, ILN 1879.jpg 1,952 × 1,008; 331 KB
-
 ILN 1879, p. 468.jpg 2,165 × 1,465; 364 KB
-
 ILN 1879, p. 469.jpg 1,465 × 2,165; 432 KB
-
 Afgwomen.png 1,310 × 962; 1.42 MB
-
 Agamemnon 1879.png 784 × 595; 581 KB
-
 Ahin Posh stupa view by William Simpson, Illustrated London News August 16, 1879.jpg 1,680 × 1,258; 1.53 MB
-
 An old Afghan man sits with a woman and child on the ground Wellcome V0019237.jpg 3,016 × 2,404; 3.96 MB
-
 Battle of Futtehabad.jpg 1,035 × 714; 237 KB
-
 Chelmsfords-return-l.jpg 1,500 × 1,052; 354 KB
-
 Comus ILN2.JPG 680 × 460; 74 KB
-
 Dabulamanzi, crop.jpg 521 × 561; 183 KB
-
 Dabulamanzi.jpg 918 × 1,200; 447 KB
-
 Damageshuascar.JPG 614 × 615; 50 KB
-
 Drilling the 12th Khelat-I-Ghilzies in the lines at Mooltan - ILN 1879.jpg 1,070 × 736; 587 KB
-
 Execution of a Ghazi, or Mohammedan fanatic at the peshawur Wellcome V0041834.jpg 2,475 × 3,095; 4.19 MB
-

-
 Gingidlovu-2 (cropped to cutlass bayonets).jpg 142 × 194; 7 KB
-

-
 HMS Thunderer Gun Explosion.png 648 × 427; 289 KB
-

-
 Inside the laager at Ginghilovo during the Zulu attack.jpg 800 × 567; 86 KB
-
 Kambula 1.jpg 1,050 × 751; 276 KB
-
 Lawn tennis drawing, newspaper, around 1879.jpg 1,922 × 2,806; 2.49 MB
-

-
 Map of Lord Chelmsford's Route to the Relief of Ekowe, &c (cropped).jpg 2,644 × 3,066; 629 KB
-
 Map of Lord Chelmsford's Route to the Relief of Ekowe, &c.jpg 4,128 × 5,984; 1.98 MB
-
 Mary Wheatland ILN 1879.jpg 552 × 733; 189 KB
-
 Natal Mounted Police 1879.jpg 607 × 727; 210 KB
-
 Ntombe.jpg 1,752 × 2,233; 2.32 MB
-
 Pictorial Journalism.jpg 4,100 × 5,984; 2.2 MB
-

-
 Rodmans Guns installed in Valparaíso in 1879.png 655 × 423; 714 KB
-
 Sir David Kinloch, Bart.jpg 4,088 × 5,984; 2.41 MB
-
 Sketch of King Yaqub Khan of Afghanistan in 1879-cropped.jpg 1,847 × 2,282; 2.21 MB
-
 Sketch of King Yaqub Khan of Afghanistan in 1879.jpg 2,480 × 3,509; 4.38 MB
-
 The Afghan War, Fort of Dakka, on the Cabul River - ILN 1879.jpg 2,538 × 1,062; 1.7 MB
-

-
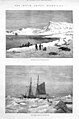 The Dutch Arctic Expedition - ILN-1879-0125-0012.jpg 1,507 × 2,272; 1.55 MB
-
 The final repulse of the Zulus at Ginghilovo - ILN 1879.jpg 2,038 × 1,290; 766 KB
-
 The Illustrated London News, 14 June 1879. p. 561.jpg 4,072 × 5,984; 1.48 MB
-

-
 The International Exhibition Building Sydney.jpg 800 × 485; 146 KB
-
 The late Captain W. R. C. Wynne - The Illustrated London News, 14 June 1879. p. 561.jpg 1,133 × 1,480; 150 KB
-
 The Late Colonel Home, C.B., R.E., &c (cropped).jpg 1,474 × 2,107; 359 KB
-
 The Late Colonel Home, C.B., R.E., &c.jpg 4,104 × 5,984; 2.06 MB
-
 The Late General Peel, &c (cropped).jpg 1,104 × 1,418; 129 KB
-
 The Late General Peel, &c.jpg 4,092 × 5,984; 1.13 MB
-

-
 The Zulu War; Camp of the 13th and 90th Regiments at Eland's Neck, &c.jpg 4,092 × 5,984; 2.12 MB
-
 The Zulu War; Colonel Pearson's Column Crossing the Tugela (1 & 2).jpg 8,376 × 5,984; 7.56 MB
-
 The Zulu War; Colonel Pearson's Column Crossing the Tugela (1).jpg 4,188 × 5,984; 2.12 MB
-
 The Zulu War; Colonel Pearson's Column Crossing the Tugela (2).jpg 4,188 × 5,984; 1.86 MB
-
 The Zulu War; Departure of the 17th Lancers, &c., Colonel Glyn's Force, &c.jpg 4,108 × 5,984; 2.2 MB
-
 The Zulu War; Garrison of Fort Pearson, &c (cropped).jpg 2,958 × 3,638; 1.45 MB
-
 The Zulu War; Garrison of Fort Pearson, &c.jpg 4,096 × 5,984; 2.19 MB
-
 The Zulu War; Maps.jpg 4,100 × 5,984; 2.02 MB
-
 The Zulu War; Officers of the 24th Regiment Killed at Isandula.jpg 4,092 × 5,984; 1.44 MB
-
 The Zulu War; Scene of the Battle of Isandula, &c. (1 & 2).jpg 8,241 × 5,984; 8.09 MB
-
 The Zulu War; Scene of the Battle of Isandula, &c. (1).jpg 4,121 × 5,984; 2.03 MB
-
 The Zulu War; Scene of the Battle of Isandula, &c. (2).jpg 4,120 × 5,984; 2.28 MB
-
 The Zulu War; Sketches at the Victoria Docks on the Departure of the 17th Lancers.jpg 4,092 × 5,984; 2.19 MB
-
 The Zulu War; The Intrenched Position at Rorke's Drift (1 & 2).jpg 8,233 × 5,984; 9.01 MB
-
 The Zulu War; The Intrenched Position at Rorke's Drift (1).jpg 4,116 × 5,984; 2.23 MB
-
 The Zulu War; The Intrenched Position at Rorke's Drift (2).jpg 4,117 × 5,984; 2.49 MB
-
 Tullochgorum Reel in the camp of the 72nd Highlanders, at Kohat ILN 1879.jpg 1,078 × 756; 612 KB


.jpg)


.jpg)


.jpg)


.JPG)


.jpg)

.jpg)


.jpg)
.jpg)
.jpg)

.jpg)


.jpg)
.jpg)
.jpg)

.jpg)
.jpg)
.jpg)

_(cropped).jpg)