Category:January 2021 Hong Kong photographs
Jump to navigation
Jump to search

English: Images taken in Hong Kong during this month of 2021 (not the date of the upload). With CatScan, this allows one to browse any Hong Kong-related category by year or month. Note: Images from 2021 should be also added into the appropriate province, territory or city category of Category:2021 photographs of Hong Kong.
| Jan | Feb | Mar | Apr | May | Jun | Jul | Aug | Sep | Oct | Nov | Dec | ||
| ← | 75 | 28 | 31 | 30 | 31 | 30 | 31 | 31 | 30 | 31 | 30 | 31 | → |
|---|
Subcategories
This category has the following 31 subcategories, out of 31 total.
H
Media in category "January 2021 Hong Kong photographs"
The following 44 files are in this category, out of 44 total.
-
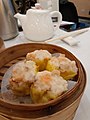 HK SW 上環 Sheung Wan 星月樓 Sky Cuisine Restaurant 飲早茶 January 2021 SS2 01.jpg 3,096 × 4,128; 3.28 MB
-
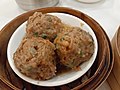 HK SW 上環 Sheung Wan 星月樓 Sky Cuisine Restaurant 飲早茶 January 2021 SS2 02.jpg 4,128 × 3,096; 2.69 MB
-
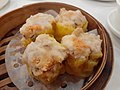 HK SW 上環 Sheung Wan 星月樓 Sky Cuisine Restaurant 飲早茶 January 2021 SS2 03.jpg 4,128 × 3,096; 2.65 MB
-
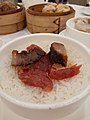
 HK SW 上環 Sheung Wan 星月樓 Sky Cuisine Restaurant 飲早茶 January 2021 SS2 04.jpg 4,128 × 3,096; 2.57 MB
-
 HK SW 上環 Sheung Wan 星月樓 Sky Cuisine Restaurant 飲早茶 January 2021 SS2 05.jpg 4,128 × 3,096; 2.73 MB
-
 HK SW 上環 Sheung Wan 星月樓 Sky Cuisine Restaurant 飲早茶 January 2021 SS2 06.jpg 3,096 × 4,128; 3.15 MB
-
 HK SW 上環 Sheung Wan 星月樓 Sky Cuisine Restaurant 飲早茶 January 2021 SS2 07.jpg 3,096 × 4,128; 3.22 MB
-
 HK SW 上環 Sheung Wan 星月樓 Sky Cuisine Restaurant 飲早茶 January 2021 SS2 08.jpg 3,096 × 4,128; 3.12 MB
-
 HK SW 上環 Sheung Wan 星月樓 Sky Cuisine Restaurant 飲早茶 January 2021 SS2 09.jpg 3,096 × 4,128; 3.15 MB
-
 HK SW 上環 Sheung Wan 星月樓 Sky Cuisine Restaurant 飲早茶 January 2021 SS2 10.jpg 3,096 × 4,128; 3.26 MB
-
 HK SW 上環 Sheung Wan 星月樓 Sky Cuisine Restaurant 飲早茶 January 2021 SS2 11.jpg 3,096 × 4,128; 3.41 MB
-
 HK SW 上環 Sheung Wan 星月樓 Sky Cuisine Restaurant 飲早茶 January 2021 SS2 12.jpg 3,096 × 4,128; 2.75 MB
-
 HK SYP 西環 Sai Ying Pun 興漢道 23 Hing Hon Road 高士台 T2-11D The Summa January 2016 DSC 200.jpg 4,896 × 3,672; 5.82 MB
-
 HK SYP 西環 Sai Ying Pun 興漢道 23 Hing Hon Road 高士台 T2-11D The Summa January 2016 DSC 201.jpg 3,672 × 4,896; 5.45 MB
-
 HK SYP 西環 Sai Ying Pun 興漢道 23 Hing Hon Road 高士台 T2-11D The Summa January 2016 DSC 202.jpg 3,672 × 4,896; 3.93 MB
-

-
 HK SYP 西環 Sai Ying Pun 興漢道 23 Hing Hon Road 高士台 T2-11D The Summa January 2016 DSC 204.jpg 3,672 × 4,896; 4.08 MB
-
 HK SYP 西環 Sai Ying Pun 興漢道 23 Hing Hon Road 高士台 T2-11D The Summa January 2016 DSC 205.jpg 4,896 × 3,672; 3.78 MB
-
 HK SYP 西環 Sai Ying Pun 興漢道 23 Hing Hon Road 高士台 T2-11D The Summa January 2016 DSC 206.jpg 4,896 × 3,672; 3.66 MB
-
 HK SYP 西環 Sai Ying Pun 興漢道 23 Hing Hon Road 高士台 T2-11D The Summa January 2016 DSC 207.jpg 4,896 × 3,672; 4.14 MB
-
 HK SYP 西環 Sai Ying Pun 興漢道 23 Hing Hon Road 高士台 T2-11D The Summa January 2016 DSC 208.jpg 3,672 × 4,896; 3.75 MB
-

-
 HK SYP 西環 Sai Ying Pun 興漢道 23 Hing Hon Road 高士台 T2-11D The Summa January 2016 DSC 210.jpg 4,896 × 3,672; 4.85 MB
-
 HK SYP 西環 Sai Ying Pun 興漢道 23 Hing Hon Road 高士台 T2-11D The Summa January 2016 DSC 211.jpg 4,896 × 3,672; 5.39 MB
-
 HK SYP 西環 Sai Ying Pun 興漢道 23 Hing Hon Road 高士台 T2-11D The Summa January 2016 DSC 212.jpg 4,896 × 3,672; 5.35 MB
-
 HK SYP 西環 Sai Ying Pun 興漢道 23 Hing Hon Road 高士台 T2-11D The Summa January 2016 DSC 213.jpg 4,896 × 3,672; 4.88 MB
-
 HK SYP 西環 Sai Ying Pun 興漢道 23 Hing Hon Road 高士台 T2-11D The Summa January 2016 DSC 214.jpg 3,672 × 4,896; 3.94 MB
-
 HK SYP 西環 Sai Ying Pun 興漢道 23 Hing Hon Road 高士台 T2-11D The Summa January 2016 DSC 215.jpg 4,896 × 3,672; 4.51 MB
-
 HK SYP 西環 Sai Ying Pun 興漢道 23 Hing Hon Road 高士台 T2-11D The Summa January 2016 DSC 216.jpg 4,896 × 3,672; 5.43 MB
-
 HK SYP 西環 Sai Ying Pun 興漢道 23 Hing Hon Road 高士台 T2-11D The Summa January 2016 DSC 217.jpg 3,672 × 4,896; 5.01 MB
-
 HK SYP 西環 Sai Ying Pun 興漢道 23 Hing Hon Road 高士台 T2-11D The Summa January 2016 DSC 218.jpg 4,896 × 3,672; 5.47 MB
-
 HK SYP 西環 Sai Ying Pun 興漢道 23 Hing Hon Road 高士台 T2-11D The Summa January 2016 DSC 219.jpg 4,896 × 3,672; 5.33 MB
-
 HK SYP 西環 Sai Ying Pun 興漢道 23 Hing Hon Road 高士台 T2-11D The Summa January 2016 DSC 220.jpg 3,672 × 4,896; 5.02 MB
-
 HK SYP 西環 Sai Ying Pun 興漢道 23 Hing Hon Road 高士台 T2-11D The Summa January 2016 DSC 221.jpg 3,672 × 4,896; 4.96 MB
-
 HK SYP 西環 Sai Ying Pun 興漢道 23 Hing Hon Road 高士台 T2-11D The Summa January 2016 DSC 222.jpg 3,672 × 4,896; 4.78 MB
-
 HK SYP 西環 Sai Ying Pun 興漢道 23 Hing Hon Road 高士台 T2-11D The Summa January 2016 DSC 223.jpg 4,896 × 3,672; 5.41 MB
-
 HK SYP 西環 Sai Ying Pun 興漢道 23 Hing Hon Road 高士台 T2-11D The Summa January 2016 DSC 224.jpg 4,896 × 3,672; 4.18 MB
-
 HK SYP 西環 Sai Ying Pun 興漢道 23 Hing Hon Road 高士台 T2-11D The Summa January 2016 DSC 225.jpg 3,672 × 4,896; 3.98 MB
-
 HK SYP 西環 Sai Ying Pun 興漢道 23 Hing Hon Road 高士台 T2-11D The Summa January 2016 DSC 226.jpg 4,896 × 3,672; 4.22 MB
-
 HK SYP 西環 Sai Ying Pun 興漢道 23 Hing Hon Road 高士台 T2-11D The Summa January 2016 DSC 227.jpg 4,896 × 3,672; 4.75 MB
-
 HK SYP 西環 Sai Ying Pun 興漢道 23 Hing Hon Road 高士台 T2-11D The Summa January 2016 DSC 228.jpg 4,896 × 3,672; 4.74 MB
-

-
 HK SYP 西環 Sai Ying Pun 興漢道 23 Hing Hon Road 高士台 T2-11D The Summa January 2016 DSC 230.jpg 3,672 × 4,896; 4.33 MB
-
 HK SYP 西環 Sai Ying Pun 興漢道 23 Hing Hon Road 高士台 T2-11D The Summa January 2016 DSC 231.jpg 3,672 × 4,896; 4.91 MB


