Category:Interiors of tunnels in Australia
Jump to navigation
Jump to search
Media in category "Interiors of tunnels in Australia"
The following 59 files are in this category, out of 59 total.
-
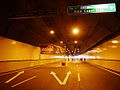 12-07-15 Airportlink Opening - Southbound.jpg 1,200 × 900; 631 KB
-
 12-07-15 Airportlink Opening - Southern Portal - Northbound Gantry.jpg 1,200 × 900; 744 KB
-
 AK5D1508.jpg 5,760 × 3,840; 7.07 MB
-
 Banora Point Bypass.jpg 1,000 × 750; 404 KB
-
 Burnley Tunnel interior.jpg 1,024 × 681; 101 KB
-
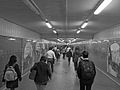
 Central railway station tunnel, Brisbane.jpg 3,264 × 2,448; 2.02 MB
-
 Central railway station underpass, Brisbane.jpg 3,264 × 2,448; 2.06 MB
-
 Colinton Tunnel - Interior, looking south (Nov. 2020).jpg 4,000 × 3,000; 2.35 MB
-
 Devonshire Street Pedestrian Tunnel in the 1970s.jpg 999 × 663; 122 KB
-
 Devonshire Street tunnel (10266117563).jpg 1,200 × 900; 378 KB
-
 Devonshire Street Tunnel March 2017.jpg 4,032 × 3,024; 3.26 MB
-
 Driving along the Legacy Way tunnel.jpg 3,472 × 2,600; 1.69 MB
-

-
 Graffiti and Cockle creek - Ku-ring-gai chase national park -Sydney 2022.jpg 4,608 × 3,456; 3.37 MB
-
 Inside abandoned railway tunnel, Otford (53179676330).jpg 5,184 × 3,456; 5.86 MB
-
Lane Cove Tunnel - Eastbound.ogv 4 min 22 s, 426 × 240; 47.03 MB
-
Lane Cove Tunnel - entrance heading east.ogv 14 s, 432 × 240; 1.54 MB
-

-

-
 Looking north towards entrance of abandoned railway tunnel, Otford (53179434709).jpg 5,184 × 3,456; 6.34 MB
-
 M4 Tunnel Sydney Entrance Concord.png 1,440 × 806; 1.27 MB
-
 MCL 003 deluge-clear-600-2.jpg 642 × 435; 154 KB
-
 MCL 017 BURNLEY BORED 3-touched-cropped.jpg 655 × 393; 100 KB
-
 MCL-008-escape-passage-1-part-small.jpg 616 × 428; 91 KB
-
 MCL-Swan-St-vent-shaft.jpg 1,856 × 1,271; 226 KB
-
 Melba tunnel.jpg 1,024 × 683; 133 KB
-
 MiddleGeorgeshedfort0064.JPG 3,072 × 2,304; 3.05 MB
-
 MiddleGeorgeshedfort0193.JPG 3,072 × 2,304; 2.57 MB
-
 MiddleGeorgeshedfort0203.JPG 3,072 × 2,304; 3.1 MB
-
 MiddleGeorgeshedfort0258.JPG 2,304 × 3,072; 2.65 MB
-
 NSBT construction.jpg 2,048 × 1,536; 1.04 MB
-
 Old machinery left at entrance to abandoned railway tunnel, Otford (53179735668).jpg 5,184 × 3,456; 7.96 MB
-
 Old tractor machinery inside abandoned railway tunnel, Otford (53179434874).jpg 5,184 × 3,456; 7.22 MB
-
 Pyrmont tunnel east portal from inside.jpg 3,513 × 2,309; 1.69 MB
-
 Pyrmont tunnel looking west from John St Square station.jpg 4,080 × 3,072; 2.88 MB
-
 Pyrmont tunnel west portal from inside.jpg 4,080 × 3,072; 3.38 MB
-
 Site of Second World War bunker in abandoned railway tunnel, Stanwell Park (53179681550).jpg 5,184 × 3,456; 6.97 MB
-
 Site of Second World War bunker in abandoned railway tunnel, Stanwell Park (53179682315).jpg 5,184 × 3,456; 7.01 MB
-
 Sydney Harbour Tunnel.jpg 640 × 480; 74 KB
-
 Tunnel under Commonwealth Ave March 2013.jpg 4,032 × 3,024; 4.16 MB
-
 Ventilation shaft inside abandoned railway tunnel, Otford (53179740338).jpg 5,184 × 3,456; 7.54 MB
-
 Wall indent inside abandoned railway tunnel, Otford (53179677200).jpg 3,456 × 5,184; 5.13 MB
-
 World War II Oil Storage Tunnels in Darwin, Northern Territory, Australia (2).jpg 3,264 × 2,448; 3.09 MB
-
 World War II Oil Storage Tunnels in Darwin, Northern Territory, Australia (3).jpg 2,448 × 3,264; 2.74 MB
-
 World War II Oil Storage Tunnels in Darwin, Northern Territory, Australia.jpg 2,448 × 3,264; 3.23 MB
-
 WWII Oil Storage Tunnels 01.jpg 3,648 × 2,736; 5.58 MB
-
 WWII Oil Storage Tunnels 02.jpg 3,648 × 2,736; 5.67 MB
-
 WWII Oil Storage Tunnels 03.jpg 3,648 × 2,736; 4.91 MB
-
 WWII Oil Storage Tunnels 04.jpg 1,024 × 683; 289 KB
-
 WWII Oil Storage Tunnels 05.jpg 1,024 × 683; 365 KB
-
 WWII Oil Storage Tunnels.jpg 3,648 × 2,736; 5.65 MB
-
 WWIIBunkA-HENRYHEAD0050.JPG 3,072 × 2,304; 2.93 MB
-
 WWIIBunkA-HENRYHEAD0055.JPG 3,072 × 2,304; 2.71 MB
-
 WWIIBunkA-HENRYHEAD0067.JPG 3,072 × 2,304; 2.4 MB
-
 WWIIBunkA-HENRYHEAD0111.JPG 2,241 × 3,014; 2.38 MB
-
 WWIIBunkA-HENRYHEAD0126.JPG 3,112 × 2,358; 2.08 MB
-
 WWIIBunkALaPeruseNSW0024.JPG 3,072 × 2,304; 2.92 MB
-
 WWIIBunkALaPeruseNSW0027.JPG 3,072 × 2,304; 2.53 MB
-
 Wynyard Walk Tunnel.jpg 3,264 × 2,448; 1.65 MB


.jpg)

.jpg)


_(State_Electricity_Commission_of_Victoria)_-_(Frank_Hurley)_(9781142495).jpg)

.jpg)
_end_in_curved_section_of_abandoned_railway_tunnel,_Stanwell_Park_(53179741808).jpg)
.jpg)
.jpg)


.jpg)
.jpg)


.jpg)
.jpg)


.jpg)
.jpg)
.jpg)
.jpg)


