Category:Images from Museums Galleries Scotland
Jump to navigation
Jump to search
Explanation
[edit]These images have been uploaded as part of a partnership between Wikimedia UK and Museums Galleries Scotland.
Media in category "Images from Museums Galleries Scotland"
The following 140 files are in this category, out of 140 total.
-
 Burrell Collection Collections 1 2022.jpg 2,048 × 1,365; 1.46 MB
-
 Burrell Collection Collections 2 2022.jpg 2,048 × 1,365; 1.21 MB
-
 Burrell Collection Collections 3 2022.jpg 2,048 × 1,365; 1.38 MB
-
 Burrell Collection Collections 4 2022.jpg 2,048 × 1,365; 1.31 MB
-
 Burrell Collection Collections 5 2022.jpg 2,048 × 1,365; 1.43 MB
-
 Burrell Collection Collections 6 2022.jpg 2,048 × 1,365; 1.77 MB
-
 Burrell Collection Collections 7 2022.jpg 2,048 × 1,365; 1.69 MB
-
 Burrell Collection Collections 8 2022.jpg 2,048 × 1,365; 1.03 MB
-
 Burrell Collection Collections 9 2022.jpg 2,048 × 2,048; 3.2 MB
-
 Burrell Collection Exterior 1 2022.jpg 2,048 × 1,365; 1.46 MB
-
 Burrell Collection Interior 1 2022.jpg 1,365 × 2,048; 941 KB
-
 Burrell Collection Interior 10 2022.jpg 2,048 × 2,048; 1.68 MB
-
 Burrell Collection Interior 11 2022.jpg 2,048 × 1,365; 1 MB
-
 Burrell Collection Interior 12 2022.jpg 2,048 × 1,365; 1.3 MB
-
 Burrell Collection Interior 2 2022.jpg 2,048 × 1,365; 991 KB
-
 Burrell Collection Interior 3 2022.jpg 2,048 × 1,365; 1.51 MB
-
 Burrell Collection Interior 4 2022.jpg 2,048 × 1,365; 1.79 MB
-
 Burrell Collection Interior 5 2022.jpg 2,048 × 1,365; 1.18 MB
-
 Burrell Collection Interior 6 2022.jpg 1,365 × 2,048; 1.23 MB
-
 Burrell Collection Interior 7 2022.jpg 2,048 × 1,365; 963 KB
-
 Burrell Collection Interior 8 2022.jpg 2,048 × 1,365; 910 KB
-
 Burrell Collection Interior 9 2022.jpg 2,048 × 1,365; 890 KB
-
 Burrell Collection Retail 1 2022.jpg 2,048 × 1,365; 1.22 MB
-
 Burrell Collection Retail 2 2022.jpg 2,048 × 1,365; 1.3 MB
-
 Burrell Collection Retail 3 2022.jpg 2,048 × 1,365; 1.53 MB
-
 Burrell Collection Retail 4 2022.jpg 2,048 × 1,365; 1.5 MB
-
 City Art Centre Auld Reekie Retold Exhibition 1 2023.jpg 2,048 × 1,365; 714 KB
-
 City Art Centre Auld Reekie Retold Exhibition 2 2023.jpg 2,048 × 1,365; 726 KB
-
 City Art Centre Auld Reekie Retold Exhibition 3 2023.jpg 1,365 × 2,048; 702 KB
-
 City Art Centre Auld Reekie Retold Exhibition 4 2023.jpg 1,365 × 2,048; 790 KB
-
 City Art Centre Auld Reekie Retold Exhibition 5 2023.jpg 2,048 × 1,365; 638 KB
-
 City Art Centre Auld Reekie Retold Exhibition 6 2023.jpg 2,048 × 1,365; 701 KB
-
 City Art Centre Auld Reekie Retold Exhibition 7 2023.jpg 2,048 × 1,365; 832 KB
-
 City Art Centre Auld Reekie Retold Exhibition 8 2023.jpg 2,048 × 1,365; 842 KB
-
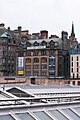
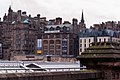 City Art Centre Exterior 1 2022.jpg 2,048 × 1,365; 812 KB
-
 City Art Centre Exterior 2 2022.jpg 1,365 × 2,048; 832 KB
-
 City Art Centre Exterior 3 2022.jpg 2,048 × 1,365; 656 KB
-
 City Art Centre Exterior 4 2022.jpg 2,048 × 1,365; 802 KB
-
 City Art Centre Exterior 5 2022.jpg 2,048 × 1,365; 791 KB
-
 City Art Centre Exterior 6 2022.jpg 2,048 × 1,365; 824 KB
-
 Cupar Museum Collections 1 2022.jpg 2,048 × 1,365; 872 KB
-
 Cupar Museum Collections 2 2022.jpg 2,048 × 1,365; 847 KB
-
 Cupar Museum Collections 3 2022.jpg 2,048 × 1,365; 1.02 MB
-
 Cupar Museum Collections 4 2022.jpg 2,048 × 1,365; 950 KB
-
 Cupar Museum Collections 5 2022.jpg 2,048 × 1,365; 1.1 MB
-
 Cupar Museum Collections 6 2022.jpg 2,048 × 1,365; 1.01 MB
-
 Cupar Museum Exterior 1 2022.jpg 2,048 × 1,365; 1.25 MB
-
 Cupar Museum Exterior 2 2022.jpg 1,365 × 2,048; 1.56 MB
-
 Dovecot Studios Interior 1 2023.jpg 2,048 × 1,365; 814 KB
-
 Dovecot Studios Interior 2 2023.jpg 2,048 × 1,365; 1.03 MB
-
 Dovecot Studios Interior 3 2023.jpg 2,048 × 1,365; 939 KB
-
 Dovecot Studios Interior 4 2023.jpg 2,048 × 1,365; 858 KB
-
 Dovecot Studios Interior 5 2023.jpg 1,365 × 2,048; 807 KB
-
 Fairfield Heritage Collections 1 2022.jpg 2,048 × 1,365; 1.26 MB
-
 Fairfield Heritage Collections 2 2022.jpg 2,048 × 1,365; 1.32 MB
-
 Fairfield Heritage Interior 1 2022.jpg 2,048 × 1,365; 1.42 MB
-
 Fairfield Heritage Interior 2 2022.jpg 2,048 × 1,365; 1.49 MB
-
 Fairfield Heritage Interior 3 2022.jpg 2,048 × 1,365; 1.52 MB
-
 Fairfield Heritage Interior 4 2022.jpg 2,048 × 1,365; 1.36 MB
-
 Fairfield Heritage Interior 5 2022.jpg 2,048 × 1,365; 1.5 MB
-
 Fife Folk Museum Collections 1 2022.jpg 1,365 × 2,048; 1.33 MB
-
 Fife Folk Museum Collections 2 2022.jpg 2,048 × 1,365; 1.4 MB
-
 Fife Folk Museum Collections 3 2022.jpg 2,048 × 1,365; 1.51 MB
-
 Fife Folk Museum Collections 4 2022.jpg 1,365 × 2,048; 1.24 MB
-
 Fife Folk Museum Collections 5 2022.jpg 2,048 × 1,365; 1.47 MB
-
 Fife Folk Museum Exterior 1 2022.jpg 2,048 × 1,365; 1.71 MB
-
 Fife Folk Museum Exterior 2 2022.jpg 1,365 × 2,048; 1.78 MB
-
 Fife Folk Museum Exterior 3 2022.jpg 2,048 × 1,365; 1.12 MB
-
 Fife Folk Museum Exterior 4 2022.jpg 2,048 × 1,365; 1.8 MB
-
 Fife Folk Museum Exterior 5 2022.jpg 2,048 × 1,365; 1.98 MB
-
 Fife Folk Museum Exterior 6 2022.jpg 1,365 × 2,048; 2 MB
-
 Fife Folk Museum Interior 1 2022.jpg 2,048 × 1,365; 1.55 MB
-
 Fife Folk Museum Interior 2 2022.jpg 1,365 × 2,048; 1,016 KB
-
 Fife Folk Museum Interior 3 2022.jpg 2,048 × 1,365; 1.13 MB
-
 Fife Folk Museum Interior 4 2022.jpg 2,048 × 1,365; 1.16 MB
-
 Fife Folk Museum Interior 5 2022.jpg 2,048 × 1,365; 1.18 MB
-
 Govan Stones Collections 1 2022.jpg 1,365 × 2,048; 1.4 MB
-
 Govan Stones Collections 2 2022.jpg 2,048 × 1,365; 1.54 MB
-
 Govan Stones Collections 3 2022.jpg 2,048 × 1,365; 1.71 MB
-
 Govan Stones Collections 4 2022.jpg 2,048 × 1,365; 1.48 MB
-
 Govan Stones Collections 5 2022.jpg 2,048 × 1,365; 1.4 MB
-
 Govan Stones Interior 1 2022.jpg 1,373 × 2,048; 1.75 MB
-
 Govan Stones Interior 2 2022.jpg 2,048 × 1,365; 1.83 MB
-
 Govan Stones Interior 3 2022.jpg 1,365 × 2,048; 1.48 MB
-
 Govan Stones Retail 1 2022.jpg 2,048 × 1,365; 1.59 MB
-
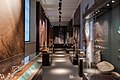
 Hunterian Museum Collections 1 - 2023.jpg 2,560 × 1,707; 3.5 MB
-
 Hunterian Museum Collections 2 - 2023.jpg 2,560 × 1,707; 3.24 MB
-
 Hunterian Museum Collections 3 - 2023.jpg 2,560 × 1,707; 3.48 MB
-
 Hunterian Museum Collections 4 - 2023.jpg 2,560 × 1,707; 2.72 MB
-
 Hunterian Museum Interior 1 - 2023.jpg 1,707 × 2,560; 3.67 MB
-
 Hunterian Museum Interior 2 - 2023.jpg 1,707 × 2,560; 3.56 MB
-
 National Mining Museum Scotland Collections 1.jpg 1,920 × 2,560; 3.45 MB
-
 National Mining Museum Scotland Collections 2.jpg 1,920 × 2,560; 2.7 MB
-
 National Mining Museum Scotland Exterior 1.jpg 2,560 × 1,920; 3.89 MB
-
 National Mining Museum Scotland Exterior 2.jpg 1,920 × 2,560; 2.99 MB
-
 National Mining Museum Scotland Exterior 3.jpg 2,560 × 1,920; 3.54 MB
-
 National Mining Museum Scotland Interior 1.jpg 2,560 × 1,707; 3.62 MB
-
 National Mining Museum Scotland Interior 2.jpg 2,560 × 1,920; 4.09 MB
-
 National Mining Museum Scotland Interior 3.jpg 1,707 × 2,560; 3.08 MB
-
 National Mining Museum Scotland Interior 4.jpg 1,920 × 2,560; 4.6 MB
-
 National Mining Museum Scotland Retail 1.jpg 2,560 × 1,707; 2.82 MB
-
 National Mining Museum Scotland Retail 2.jpg 2,560 × 1,707; 2.41 MB
-
 National Museum of Scotland collections 1.jpg 1,920 × 2,560; 899 KB
-
 National Museum of Scotland collections 2.jpg 1,920 × 2,560; 889 KB
-
 National Museum of Scotland Collections 3.jpg 2,560 × 1,707; 1.2 MB
-
 National Museum of Scotland Collections 4.jpg 1,707 × 2,560; 1.22 MB
-
 National Museum of Scotland Visitors 1.jpg 1,707 × 2,560; 973 KB
-
 Perth Museum Collections 1 2024.jpg 2,560 × 1,707; 2.53 MB
-
 Perth Museum Collections 10 2024.jpg 2,560 × 1,707; 2.57 MB
-
 Perth Museum Collections 2 2024.jpg 2,560 × 1,707; 2.31 MB
-
 Perth Museum Collections 3 2024.jpg 1,707 × 2,560; 3.05 MB
-
 Perth Museum Collections 4 2024.jpg 1,707 × 2,560; 2.69 MB
-
 Perth Museum Collections 5 2024.jpg 2,560 × 1,707; 2.91 MB
-
 Perth Museum Collections 6 2024.jpg 2,560 × 1,707; 3.93 MB
-
 Perth Museum Collections 7 2024.jpg 2,560 × 1,707; 2.2 MB
-
 Perth Museum Collections 8 2024.jpg 2,560 × 1,707; 3.67 MB
-
 Perth Museum Collections 9 2024.jpg 2,560 × 1,707; 3.09 MB
-
 Perth Museum Interior 1 2024.jpg 2,560 × 1,707; 2.64 MB
-
 Perth Museum Interior 10 2024.jpg 2,560 × 1,707; 2.74 MB
-
 Perth Museum Interior 11 2024.jpg 2,560 × 1,707; 2.75 MB
-
 Perth Museum Interior 12 2024.jpg 2,560 × 1,707; 2.76 MB
-
 Perth Museum Interior 13 2024.jpg 2,560 × 1,707; 3.17 MB
-
 Perth Museum Interior 14 2024.jpg 2,560 × 1,707; 2.98 MB
-
 Perth Museum Interior 2 2024.jpg 2,560 × 1,707; 2.64 MB
-
 Perth Museum Interior 3 2024.jpg 2,560 × 1,707; 3.01 MB
-
 Perth Museum Interior 4 2024.jpg 2,560 × 1,707; 2.56 MB
-
 Perth Museum Interior 5 2024.jpg 2,560 × 1,707; 2.63 MB
-
 Perth Museum Interior 6 2024.jpg 2,560 × 1,707; 2.81 MB
-
 Perth Museum Interior 7 2024.jpg 2,560 × 1,707; 2.6 MB
-
 Perth Museum Interior 8 2024.jpg 2,560 × 1,707; 2.37 MB
-
 Perth Museum Interior 9 2024.jpg 1,707 × 2,560; 2.41 MB
-
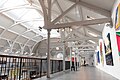
 Surgeons' Hall Exterior 1 2022.jpg 1,638 × 2,048; 1.09 MB
-
 Surgeons' Hall Exterior 2 2022.jpg 2,048 × 1,365; 896 KB
-
 Surgeons' Hall Exterior 3 2022.jpg 2,048 × 1,365; 716 KB
-
 Surgeons' Hall Exterior 4 2022.jpg 2,048 × 1,365; 823 KB
-
 Surgeons' Hall Exterior 5 2022.jpg 1,365 × 2,048; 464 KB
-
 Surgeons' Hall Exterior 6 2022.jpg 2,048 × 1,365; 541 KB
-
 Surgeons' Hall Exterior 7 2022.jpg 1,390 × 2,048; 685 KB
-
 The Living Memory Association Exterior 1 2022.jpg 2,048 × 1,365; 683 KB
-
 The Living Memory Association Queer Edinburgh 1 2022.jpg 2,048 × 1,365; 663 KB


