Category:Handyman photos by tom sulcer
Jump to navigation
Jump to search
Media in category "Handyman photos by tom sulcer"
The following 200 files are in this category, out of 237 total.
(previous page) (next page)-
 9 Irving A 2014 bedroom hardwood floor fan.JPG 864 × 648; 121 KB
-
 9 Irving A 2014 do-it-yourself anti-tip clip for stove.JPG 571 × 451; 57 KB
-
 9 Irving A 2014 finished fireplace in kitchen.JPG 1,032 × 840; 126 KB
-

-
 9 Irving A 2014 fixing broken fireplace mantle glue about to be pushed shut.JPG 1,257 × 823; 222 KB
-
 9 Irving A 2014 fixing broken fireplace mantle with glue.JPG 1,944 × 2,592; 758 KB
-
 9 Irving A 2014 hardwood floors living room and part of bedroom.JPG 786 × 629; 96 KB
-
 9 Irving A 2014 installing transition strip with cap.JPG 1,145 × 621; 146 KB
-
 9 Irving A 2014 kitchen almost finished.JPG 864 × 648; 123 KB
-
 9 Irving A 2014 kitchen fireplace mantle almost finished.JPG 1,112 × 868; 163 KB
-
 9 Irving A 2014 new flooring in bathroom.JPG 847 × 807; 135 KB
-
 9 Irving A 2014 transition strip.JPG 721 × 532; 101 KB
-
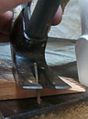
 After using a butt marker to chisel out hole for door hinge.JPG 727 × 603; 115 KB
-
 Aligning rotted support beam above with new board using clamps.JPG 2,592 × 1,944; 906 KB
-
 Bathroom ceiling with vent.jpg 3,472 × 2,604; 1.28 MB
-
 Bathroom wall with 2x4s and sheetrocked.jpg 3,472 × 2,604; 1.54 MB
-
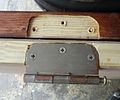
 Blind restringing project bottom rail with cap removed.jpg 682 × 227; 50 KB
-
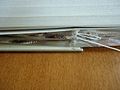
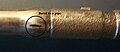 Burst pipe from freezing.jpg 1,153 × 497; 274 KB
-
 Caulking underneath bathroom sink.jpg 320 × 441; 46 KB
-

-
 Circular Saw Blade.jpg 467 × 154; 16 KB
-
 Clamps being used to glue bottom of interior door after being shortened.JPG 1,248 × 675; 231 KB
-
 Clutter in basement.jpg 648 × 586; 132 KB
-
 Comparing diameter of screw and drill point.JPG 625 × 649; 111 KB
-
 Comparing drill point diameter and length with screw.JPG 580 × 774; 151 KB
-
 Concrete being mixed in a wheel barrow before being poured into a sidewalk.JPG 1,065 × 819; 342 KB
-

-
 Concrete sidewalk setting besides a house.JPG 435 × 765; 148 KB
-
 Cutting nails with sawsall.jpg 524 × 628; 91 KB
-
 Demolition project kitchen about to undergo renovation.JPG 648 × 486; 73 KB
-

-
 Demolition project plaster and lath remaining to be sheetrocked over.JPG 541 × 846; 100 KB
-

-
 Demolition project window frame about to be replaced.JPG 627 × 627; 104 KB
-
 Diagram of water seeping into basement.jpg 580 × 480; 29 KB
-
 Draintrap.jpg 450 × 450; 43 KB
-
 Drilling a hole in a door to install a lock.JPG 874 × 845; 125 KB
-
 Drilling at an angle.jpg 527 × 500; 47 KB
-
 Electric receptacle prior to moving cabinet.JPG 610 × 641; 79 KB
-
 Faucet in a bathroom sink.jpg 419 × 472; 51 KB
-
 Feb 2015 Fence repair project shoring up weak braces adding new slats.JPG 2,592 × 1,944; 1.17 MB
-
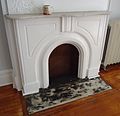 Fireplace repaired after left side being glued then painted with molding added.JPG 1,762 × 1,697; 461 KB
-
 Handyman drip art wall painting with light button upper left.JPG 2,592 × 1,944; 945 KB
-
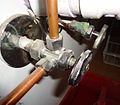
 Handyman photos Fix Barber Wilson diverter valve 1.JPG 1,199 × 899; 92 KB
-
 Handyman photos Fix Barber Wilson diverter valve 10.JPG 1,373 × 853; 171 KB
-
 Handyman photos Fix Barber Wilson diverter valve 11.JPG 1,064 × 853; 84 KB
-
 Handyman photos Fix Barber Wilson diverter valve 12.JPG 1,335 × 852; 148 KB
-
 Handyman photos Fix Barber Wilson diverter valve 13.JPG 1,375 × 852; 111 KB
-
 Handyman photos Fix Barber Wilson diverter valve 14.JPG 975 × 852; 82 KB
-
 Handyman photos Fix Barber Wilson diverter valve 15.JPG 1,168 × 853; 151 KB
-
 Handyman photos Fix Barber Wilson diverter valve 16.JPG 1,389 × 852; 126 KB
-
 Handyman photos Fix Barber Wilson diverter valve 17.JPG 1,038 × 852; 160 KB
-
 Handyman photos Fix Barber Wilson diverter valve 18.JPG 1,647 × 744; 257 KB
-
 Handyman photos Fix Barber Wilson diverter valve 19.JPG 1,647 × 829; 272 KB
-
 Handyman photos Fix Barber Wilson diverter valve 2.JPG 1,067 × 852; 64 KB
-
 Handyman photos Fix Barber Wilson diverter valve 20.JPG 640 × 853; 61 KB
-
 Handyman photos Fix Barber Wilson diverter valve 21.JPG 1,019 × 852; 127 KB
-
 Handyman photos Fix Barber Wilson diverter valve 22.JPG 1,214 × 852; 117 KB
-
 Handyman photos Fix Barber Wilson diverter valve 23.JPG 803 × 853; 56 KB
-
 Handyman photos Fix Barber Wilson diverter valve 24.JPG 753 × 853; 75 KB
-
 Handyman photos Fix Barber Wilson diverter valve 25.JPG 625 × 853; 47 KB
-
 Handyman photos Fix Barber Wilson diverter valve 3.JPG 1,067 × 852; 167 KB
-
 Handyman photos Fix Barber Wilson diverter valve 4.JPG 853 × 852; 122 KB
-
 Handyman photos Fix Barber Wilson diverter valve 6.JPG 1,019 × 852; 210 KB
-
 Handyman photos Fix Barber Wilson diverter valve 7.JPG 741 × 852; 99 KB
-
 Handyman photos Fix Barber Wilson diverter valve 8.JPG 1,094 × 853; 200 KB
-
 Handyman photos Fix Barber Wilson diverter valve 9.JPG 853 × 852; 109 KB
-
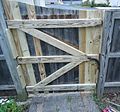 Handyman photos gate repair project.JPG 914 × 853; 221 KB
-
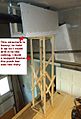 Handyman project -- A temporary box holds up section enabling drilling.jpg 806 × 1,186; 429 KB
-
 Handyman project gate repair view from driveway.JPG 757 × 853; 181 KB
-

-
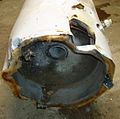
 Handyman project to disassemble hot water heater 1.JPG 419 × 718; 77 KB
-
 Handyman project to disassemble hot water heater 10.JPG 524 × 519; 81 KB
-
 Handyman project to disassemble hot water heater 11.JPG 862 × 522; 85 KB
-
 Handyman project to disassemble hot water heater 12.JPG 547 × 535; 73 KB
-
 Handyman project to disassemble hot water heater 13.JPG 615 × 463; 73 KB
-
 Handyman project to disassemble hot water heater 14.JPG 733 × 533; 113 KB
-
 Handyman project to disassemble hot water heater 15.JPG 637 × 628; 109 KB
-
 Handyman project to disassemble hot water heater 16.JPG 723 × 512; 135 KB
-
 Handyman project to disassemble hot water heater 17.JPG 738 × 556; 128 KB
-
 Handyman project to disassemble hot water heater 18.JPG 719 × 622; 156 KB
-
 Handyman project to disassemble hot water heater 19.JPG 864 × 648; 177 KB
-
 Handyman project to disassemble hot water heater 2.JPG 572 × 475; 94 KB
-
 Handyman project to disassemble hot water heater 20.JPG 694 × 572; 137 KB
-
 Handyman project to disassemble hot water heater 21.JPG 648 × 864; 170 KB
-
 Handyman project to disassemble hot water heater 22.JPG 864 × 648; 167 KB
-
 Handyman project to disassemble hot water heater 23.JPG 527 × 787; 102 KB
-
 Handyman project to disassemble hot water heater 24.JPG 445 × 743; 97 KB
-
 Handyman project to disassemble hot water heater 25.JPG 432 × 864; 93 KB
-
 Handyman project to disassemble hot water heater 26.JPG 560 × 848; 167 KB
-
 Handyman project to disassemble hot water heater 27.JPG 682 × 648; 149 KB
-
 Handyman project to disassemble hot water heater 3.JPG 652 × 513; 90 KB
-
 Handyman project to disassemble hot water heater 4.JPG 896 × 560; 92 KB
-
 Handyman project to disassemble hot water heater 5.JPG 586 × 464; 63 KB
-
 Handyman project to disassemble hot water heater 6.JPG 654 × 473; 99 KB
-
 Handyman project to disassemble hot water heater 7.JPG 706 × 562; 109 KB
-
 Handyman project to disassemble hot water heater 8.JPG 640 × 598; 103 KB
-
 Handyman project to disassemble hot water heater 9.JPG 864 × 648; 144 KB
-
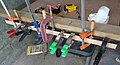
 Handyman tools in boxes at a worksite.jpg 1,018 × 943; 193 KB
-
 Hearing protectors.jpg 525 × 557; 48 KB
-
 Interior door being shortened wood bottom being removed.JPG 861 × 408; 106 KB
-

-

-

-
 Kitchen renovation 9a building cabinet above microwave plus exhaust pipe.JPG 1,076 × 698; 157 KB
-
-
 Kitchen renovation 9a cabinet and microwave with exhaust duct pipe.JPG 757 × 886; 134 KB
-

-

-
 Kitchen renovation 9a corner mantle piece installed.JPG 889 × 766; 91 KB
-
 Kitchen renovation 9a corner moldings on mantle.JPG 749 × 384; 63 KB
-

-

-

-

-
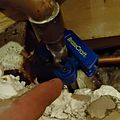
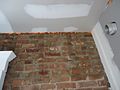
 Kitchen renovation 9a firecode expanding foam in cracks for safety.JPG 1,044 × 720; 135 KB
-
 Kitchen renovation 9a firecode foam cracks bricks ceiling.JPG 751 × 368; 55 KB
-
 Kitchen renovation 9a floor finished windows.JPG 648 × 864; 101 KB
-

-

-

-
-
 Kitchen renovation 9a new floor installed.JPG 1,190 × 939; 226 KB
-

-

-

-
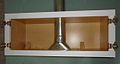
 Kitchen renovation box installed to hide ceiling pipes.JPG 926 × 619; 79 KB
-

-
 Kitchen renovation electrical panels inside basement during installation.JPG 1,296 × 972; 269 KB
-
-

-
-
 Kitchen renovation firecode insulation again in ceiling.JPG 726 × 484; 85 KB
-
 Kitchen renovation firecode insulation between floor and brick wall.JPG 938 × 512; 140 KB
-
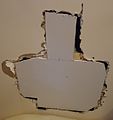
 Kitchen renovation fireplace repair project.JPG 709 × 608; 83 KB
-
 Kitchen renovation gluing molding corners.JPG 1,058 × 784; 171 KB
-
 Kitchen renovation hiding damaged molding with new molding.JPG 1,054 × 1,199; 192 KB
-
 Kitchen renovation insulation 3 inches away from light fixtures.JPG 753 × 854; 153 KB
-
 Kitchen renovation leaky valve beneath kitchen sink.JPG 697 × 611; 105 KB
-
 Kitchen renovation living room transformed into workshop.JPG 864 × 648; 129 KB
-
 Kitchen renovation new exterior meters installed.JPG 904 × 870; 196 KB
-

-
 Kitchen renovation new plumbing valve beneath kitchen sink with teflon tape.JPG 1,665 × 1,302; 378 KB
-

-

-
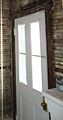
 Kitchen renovation project curtain added to exterior door windows.JPG 1,322 × 2,395; 492 KB
-
 Kitchen renovation project floors finished microwave in walls painted blinds in.JPG 2,592 × 1,944; 848 KB
-
 Kitchen renovation project mostly finished tools still on counter.JPG 2,592 × 1,944; 928 KB
-
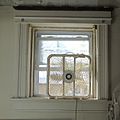
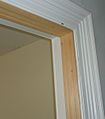
 Kitchen renovation rebuilding window frame almost done.JPG 418 × 524; 60 KB
-
 Kitchen renovation rebuilding window frame.JPG 771 × 534; 102 KB
-

-
 Kitchen renovation second layer sheetrock underneath first layer.JPG 586 × 405; 50 KB
-

-
 Kitchen renovation two layers firecode sheetrock visible.JPG 999 × 591; 83 KB
-

-

-
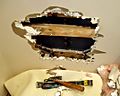
 Kitchen renovation view of bathtub pipes in ceiling of 9a.JPG 648 × 486; 111 KB
-
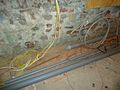 Kitchen renovation wires and conduit in basement.JPG 1,296 × 972; 313 KB
-

-
 Kohler 306 diverter valve replacement problem tiled over valve.JPG 1,659 × 1,349; 293 KB
-
 Kohler 306 diverter valve replacement putting escutcheon back.JPG 1,748 × 1,284; 392 KB
-
 Kohler 306 diverter valve replacement removing valve handle with allen wrench.JPG 1,672 × 1,389; 323 KB
-

-
 Kohler 306 valve replacement helpful product number on escutcheon plus date.JPG 1,816 × 1,611; 328 KB
-
 Kohler shower valve replacement buildup on chamber visible was scraped away.JPG 1,127 × 1,047; 175 KB
-
 Kohler shower valve replacement diverter valve with buildup different view.JPG 1,578 × 1,294; 322 KB
-
 Kohler shower valve replacement finished tested and no more leaks.JPG 1,908 × 1,524; 379 KB
-

-

-

-
 Kohler shower valve replacement new valve installed.JPG 1,813 × 1,352; 356 KB
-
 Kohler shower valve replacement old diverter with buildup being removed.JPG 1,434 × 1,294; 244 KB
-
 Kohler shower valve replacement putting lubricant on the valve seats.JPG 1,855 × 1,345; 309 KB
-
 Kohler shower valve replacement repaired chipped away tiles.JPG 1,682 × 794; 177 KB
-

-
 Kohler shower valve replacement tools on floor of shower.JPG 2,592 × 1,944; 651 KB
-
 Kohler shower valve replacement using pliers to remove defective diverter valve.JPG 2,592 × 1,944; 560 KB
-
 Leaky pipe fixed with compound and pipe wrap.JPG 648 × 486; 91 KB
-
 Mailbox built from particle board with hinges.jpg 3,280 × 2,460; 1.2 MB
-
 Modern art wall splashed handyman dripped free-form painting.jpg 3,280 × 2,460; 1.35 MB
-
 Mortar mixed inside bucket.jpg 640 × 566; 76 KB
-
 Mortar to keep basement dry.jpg 868 × 651; 92 KB
-
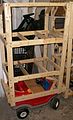 Movable shelves built on discarded toy vehicle.jpg 489 × 805; 83 KB
-
 PEX compression connectors.jpg 1,066 × 816; 192 KB
-
 PEX installation tools and fittings.jpg 1,671 × 802; 560 KB
-
 PEX piping bending in a basement.jpg 585 × 752; 92 KB
-
 Porch railings floorboard substructure moldings columns.jpg 3,472 × 2,604; 1.57 MB
-
 Project to move cabinet and microwave 4 inches higher.JPG 1,012 × 939; 164 KB
-
 Prying up a long nail.jpg 381 × 516; 35 KB
-
 Remote controlled switch works with on-off light switch.JPG 864 × 648; 114 KB
-
 Shades restringing project a flat table to lay out the shade.jpg 648 × 864; 101 KB
-
 Shades restringing project cord laid out.jpg 648 × 864; 112 KB
-
 Shades restringing project cord tied around bottom.jpg 1,296 × 972; 271 KB
-
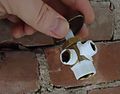
 Shades restringing project knot in plastic piece to hold cord.jpg 552 × 452; 72 KB
-
 Shades restringing project looking at top of shades.jpg 795 × 548; 87 KB
-
 Shades restringing project needle and thread pulls cord through holes.jpg 1,081 × 933; 238 KB
-
 Shades restringing project needle pulls thread which pulls the cord.jpg 1,132 × 521; 128 KB
-
 Shower diverter valve replacement project before work.jpg 864 × 648; 221 KB
-
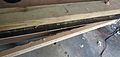
 Shower project adding boards to support backerboard.jpg 455 × 760; 71 KB
-
 Shower project adding wood to hold new diverter valve.jpg 864 × 648; 226 KB


