Category:Handley Page Halifax B Mark III
Jump to navigation
Jump to search
English: The most common variant of the British Handley Page Halifax heavy bomber of World War II, powered by Bristol Hercules radial engines.
Subcategories
This category has the following 2 subcategories, out of 2 total.
H
- Handley Page Halifax HR792 (55 F)
Media in category "Handley Page Halifax B Mark III"
The following 42 files are in this category, out of 42 total.
-
 10 Squadron RAF Halifax crew AWM P02953.001.jpg 450 × 293; 20 KB
-
 192 Squadron RAF Halifax B for Babe AWM P01523.029.jpg 450 × 297; 14 KB
-
 192 Squadron RAF Halifax WWII AWM 045271.jpg 450 × 334; 18 KB
-
 462 Sqn (AWM P01523033).jpg 450 × 297; 44 KB
-
 462 Squadron RAAF aircrew at Foulsham AWM P01523.039.jpg 640 × 413; 169 KB
-
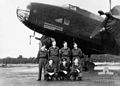
 462 Squadron RAAF Halifax aircrew AWM P01523.014.jpg 450 × 296; 25 KB
-
 462 Squadron RAAF Halifax at Driffield AWM UK2232.jpg 450 × 338; 20 KB
-
 462 Squadron RAAF Halifax at Driffield AWM UK2420.jpg 450 × 338; 16 KB
-
 462 Squadron RAAF Halifax at Foulsham AWM P01523.004.jpg 450 × 277; 19 KB
-
 462 Squadron RAAF Halifax at Foulsham AWM P01523.005.jpg 217 × 341; 8 KB
-
 462 Squadron RAAF Halifax AWM UK1915.jpg 450 × 340; 15 KB
-
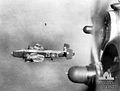
 462 Squadron RAAF Halifax in flight AWM UK1913.jpg 450 × 343; 23 KB
-
 462 Squadron RAAF Halifaxes in hangar at Driffield AWM UK2340.jpg 450 × 336; 18 KB
-
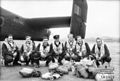
 466 Sqn Halifax crew.jpg 450 × 299; 50 KB
-
 466 Squadron Halifax aircrew at Driffield AWM UK1919.jpg 450 × 305; 21 KB
-
 466 Squadron Halifax aircrew at RAF Leconfield Jan 1944 AWM UK0959.jpg 640 × 480; 183 KB
-
 466 Squadron RAAF Halifax aircrew at Leconfield AWM UK0965A.jpg 450 × 299; 20 KB
-
 466 Squadron RAAF Halifax at Leconfield AWM UK0965.jpg 450 × 327; 16 KB
-
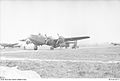
 466 Squadron RAAF Halifax at RAF Driffield AWM UK1912.jpg 450 × 334; 14 KB
-
 466 Squadron RAAF Halifax at RAF Leconfield AWM UK0966.jpg 450 × 334; 19 KB
-
 466 Squadron RAAF Halifax crew at Leconfield AWM UK0959.jpg 450 × 328; 23 KB
-
 466 Squadron RAAF Halifax engines AWM UK1914.jpg 322 × 450; 13 KB
-
 466 Squadron RAAF Halifax landing at Driffield AWM UK1909.jpg 450 × 342; 14 KB
-
 466 Squadron RAAF Halifax maintenance at Leconfield AWM UK0963.jpg 450 × 321; 22 KB
-

-
 578 Squadron RAF Halifax aircrew AWM P03759.001.jpg 450 × 323; 19 KB
-

-
 Aircrew and groundcrew of No. 432 (Leaside) Squadron, RCAF.jpeg 600 × 324; 62 KB
-

-
 Bombing up 462 Squadron RAAF Halifax in Libya AWM MEC0722.jpg 450 × 297; 20 KB
-
 Bombing up 466 Squadron RAAF Halifax at Leconfield AWM UK0968.jpg 450 × 333; 19 KB
-
 Bombing up a 466 Squadron RAAF Halifax at Leconfield AWM UK0967.jpg 450 × 321; 23 KB
-
 Chaff launching machine in Halifax bomb bay AWM P05456.004.jpg 456 × 653; 123 KB
-
 Damaged Halifax Operation Goodwood IWM CE 154.jpg 619 × 800; 69 KB
-
 Groundcrew working on a 462 Sqn bomber.jpg 450 × 334; 20 KB
-
 Halifax ECM aircraft 1341 Flight RAF over India 1945.jpg 472 × 309; 77 KB
-
 Halifax fuel tanks in bomb bay India WWII IWM C 5456.jpg 644 × 800; 65 KB
-
 Halifax-mk3.jpg 1,024 × 768; 140 KB
-
 Halifaxes at Foulsham AWM P01523.013.jpg 639 × 432; 136 KB
-

-
 Royal Air Force Bomber Command, 1942-1945. CE161.jpg 800 × 602; 53 KB
-
 Royal Air Force Operations in the Far East, 1941-1945. C5455.jpg 800 × 556; 63 KB


.jpg)


_Squadron,_RCAF.jpeg)


