Category:CORONA reentry and recovery
Jump to navigation
Jump to search
Media in category "CORONA reentry and recovery"
The following 21 files are in this category, out of 21 total.
-
 20180328 Corona hook Udvar-Hazy.jpg 2,826 × 5,279; 6.34 MB
-
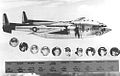 6593d Test Squadron - Discoverer 14 Pelican 1 Crew.jpg 993 × 632; 98 KB
-
 6593d Test Squadron - Discoverer 14.jpg 990 × 798; 137 KB
-
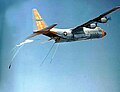
 6593d Test Squadron - Fairchild C-119J - JC-130B.jpg 924 × 664; 69 KB
-
 6593d Test Squadron - Fairchild C-119J 51-0850.jpg 1,162 × 848; 149 KB
-
 6593d Test Squadron - Lockheed JC-130B 57-527.jpg 1,159 × 890; 117 KB
-
 6593d Test Squadron - Lockheed JC-130B 57-528 (2).jpg 886 × 681; 70 KB
-
 6593d Test Squadron - Lockheed JC-130B 61-0963.jpg 1,155 × 898; 156 KB
-
 6593d Test Squadron - Lockheed JC-130B.jpg 947 × 768; 66 KB
-
 6593d Test Squadron - Sikorsky CH-3B.jpg 1,156 × 762; 200 KB
-
 Air Force Satellite Control Facility operation in recovery.PNG 645 × 519; 298 KB
-
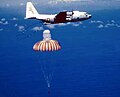
 C-119J satellite catching gear.jpg 1,800 × 1,395; 167 KB
-
 CORONA film recovery maneuvar.jpg 768 × 529; 364 KB
-
 Corona Hook Steven F. Udvar-Hazy Center.tif 3,456 × 5,184; 102.54 MB
-
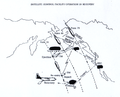
 Corona recovery sequence.PNG 629 × 590; 440 KB
-
 CORONA reentry parameters.PNG 716 × 521; 346 KB
-
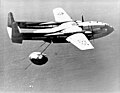 Fairchild C-119J Flying Boxcar recovers CORONA Capsule 1960 USAF 040314-O-9999R-001.jpg 1,800 × 1,395; 444 KB
-
 NMUSAF C-119 Corona 1.png 1,520 × 1,025; 1.94 MB
-
 NMUSAF C-119 Corona 2.png 1,944 × 1,296; 3.04 MB
-
 NMUSAF C-119 Corona 3.png 1,944 × 1,296; 3.02 MB
-
 NMUSAF C-119 Corona 4.png 1,944 × 1,296; 4.07 MB


.jpg)


