Category:Buildings in Pok Fu Lam Road
Jump to navigation
Jump to search
Subcategories
This category has the following 30 subcategories, out of 30 total.
*
B
C
F
G
H
- High West, Hong Kong 西苑 (4 F)
I
J
- Jessville (4 F)
K
- Kai Ming Temple (11 F)
L
- Lady Ho Tung Hall, HKU (15 F)
- Lindsay Ride Sports Centre (7 F)
P
Q
R
- Radcliffe, Hong Kong (6 F)
S
- Starr Hall, HKU (8 F)
T
- Tung Ming Court (11 F)
W
- Woodbury Court (4 F)
Y
- Yam Pak Building, HKU (2 F)
- Yar Chee Villas (8 F)
Media in category "Buildings in Pok Fu Lam Road"
The following 148 files are in this category, out of 148 total.
-
 HK Mid-Levels 薄扶林道 71-79 Pok Fu Lam Road January 2022 Px3 01.jpg 3,264 × 2,448; 3.19 MB
-
 HK Mid-Levels 薄扶林道 71-79 Pok Fu Lam Road January 2022 Px3 02.jpg 3,264 × 2,448; 3.15 MB
-
 HK Mid-Levels 薄扶林道 71-79 Pok Fu Lam Road January 2022 Px3 03.jpg 3,264 × 2,448; 3.03 MB
-
 HK Mid-Levels 薄扶林道 71-79 Pok Fu Lam Road January 2022 Px3 06.jpg 3,000 × 4,000; 5.91 MB
-
 HK Mid-Levels 薄扶林道 79 Pok Fu Lam Road January 2022 Px3.jpg 3,000 × 4,000; 5.23 MB
-

-

-

-

-

-
 HK ML 半山 Mid-level 博扶林道 63 Pok Fu Lam Road August 2020 SS2 01.jpg 2,576 × 1,932; 1.62 MB
-
 HK ML 半山 Mid-level 博扶林道 63 Pok Fu Lam Road August 2020 SS2 02.jpg 2,576 × 1,932; 1.59 MB
-
 HK ML 半山 Mid-level 博扶林道 63 Pok Fu Lam Road August 2020 SS2 03.jpg 2,576 × 1,932; 1.67 MB
-
 HK ML 半山 Mid-level 博扶林道 63 Pok Fu Lam Road August 2020 SS2 04.jpg 4,128 × 3,096; 4.91 MB
-
 HK ML 半山 Mid-level 博扶林道 63 Pok Fu Lam Road August 2020 SS2 05.jpg 2,576 × 1,932; 1.58 MB
-
 HK ML 半山 Mid-level 博扶林道 63 Pok Fu Lam Road August 2020 SS2 06.jpg 1,932 × 2,576; 1.49 MB
-
 HK ML 半山 Mid-level 博扶林道 63 Pok Fu Lam Road August 2020 SS2 07.jpg 3,096 × 4,128; 4.37 MB
-
 HK ML 半山 Mid-level 博扶林道 63 Pok Fu Lam Road August 2020 SS2 08.jpg 4,128 × 3,096; 4.74 MB
-
 HK ML 半山 Mid-level 博扶林道 63 Pok Fu Lam Road August 2020 SS2 09.jpg 1,932 × 2,576; 1.59 MB
-
 HK ML 半山 Mid-level 博扶林道 63 Pok Fu Lam Road August 2020 SS2 10.jpg 2,576 × 1,932; 1.47 MB
-
 HK ML 半山 Mid-level 博扶林道 63 Pok Fu Lam Road August 2020 SS2 11.jpg 3,096 × 4,128; 2.38 MB
-
 HK ML 半山 Mid-level 博扶林道 63 Pok Fu Lam Road August 2020 SS2 12.jpg 4,128 × 3,096; 4.64 MB
-
 HK ML 半山 Mid-level 博扶林道 63 Pok Fu Lam Road August 2020 SS2 13.jpg 2,576 × 1,932; 1.6 MB
-
 HK ML 半山 Mid-level 博扶林道 63 Pok Fu Lam Road August 2020 SS2 14.jpg 2,576 × 1,932; 1.49 MB
-
 HK ML 半山 Mid-level 博扶林道 63 Pok Fu Lam Road August 2020 SS2 15.jpg 3,096 × 4,128; 4.34 MB
-
 HK ML 半山 Mid-level 博扶林道 63 Pok Fu Lam Road August 2020 SS2 16.jpg 2,576 × 1,932; 1.43 MB
-
 HK ML 半山 Mid-level 博扶林道 63 Pok Fu Lam Road August 2020 SS2 17.jpg 4,128 × 3,096; 4.63 MB
-
 HK ML 半山 Mid-level 博扶林道 63 Pok Fu Lam Road August 2020 SS2 18.jpg 2,576 × 1,932; 1.6 MB
-
 HK ML 半山 Mid-level 博扶林道 63 Pok Fu Lam Road August 2020 SS2 19.jpg 4,128 × 3,096; 3.97 MB
-
 HK ML 半山 Mid-level 博扶林道 63 Pok Fu Lam Road August 2020 SS2 20.jpg 3,096 × 4,128; 5.94 MB
-
 HK ML 半山 Mid-level 博扶林道 63 Pok Fu Lam Road August 2020 SS2 21.jpg 4,128 × 3,096; 4.43 MB
-
 HK ML 半山 Mid-level 博扶林道 63 Pok Fu Lam Road August 2020 SS2 22.jpg 4,128 × 3,096; 4.14 MB
-
 HK ML 半山 Mid-level 博扶林道 63 Pok Fu Lam Road August 2020 SS2 23.jpg 4,128 × 3,096; 4.1 MB
-
 HK ML 半山 Mid-level 博扶林道 63 Pok Fu Lam Road August 2020 SS2 24.jpg 3,096 × 4,128; 4.76 MB
-
 HK ML 半山 Mid-level 博扶林道 63 Pok Fu Lam Road August 2020 SS2 25.jpg 4,128 × 3,096; 6.67 MB
-
 HK ML 半山 Mid-level 博扶林道 63 Pok Fu Lam Road August 2020 SS2 26.jpg 3,096 × 4,128; 4.12 MB
-
 HK ML 半山 Mid-level 博扶林道 63 Pok Fu Lam Road August 2020 SS2 27.jpg 4,128 × 3,096; 5.99 MB
-
 HK ML 半山 Mid-level 博扶林道 63 Pok Fu Lam Road August 2020 SS2 28.jpg 2,576 × 1,932; 1.49 MB
-
 HK ML 半山 Mid-level 博扶林道 63 Pok Fu Lam Road August 2020 SS2 29.jpg 4,128 × 3,096; 4.4 MB
-
 HK ML 半山 Mid-level 博扶林道 63 Pok Fu Lam Road August 2020 SS2 30.jpg 4,128 × 3,096; 8.66 MB
-
 HK ML 半山 Mid-level 博扶林道 63 Pok Fu Lam Road August 2020 SS2 31.jpg 3,096 × 4,128; 4.55 MB
-
 HK ML 半山 Mid-level 博扶林道 63 Pok Fu Lam Road August 2020 SS2 32.jpg 3,096 × 4,128; 4.32 MB
-
 HK ML 半山 Mid-level 博扶林道 63 Pok Fu Lam Road August 2020 SS2 33.jpg 2,576 × 1,932; 1.66 MB
-

-

-
 HK SYP ML 半山 Mid-level 博扶林道 31 Pok Fu Lam Road telecom January 2022 Px3 21.jpg 4,000 × 3,000; 4.76 MB
-
 HK SYP ML 半山 Mid-level 博扶林道 39 Pok Fu Lam Road Kui Yan Lane August 2023 Px3 01.jpg 3,000 × 4,000; 5.18 MB
-
 HK SYP ML 半山 Mid-level 博扶林道 39 Pok Fu Lam Road Kui Yan Lane August 2023 Px3 02.jpg 3,000 × 4,000; 6.31 MB
-

-

-
 HK SYP ML 半山 Mid-level 博扶林道 39 Pok Fu Lam Road Tung Ming Court January 2022 Px3 01.jpg 4,000 × 3,000; 5.67 MB
-
 HK SYP ML 半山 Mid-level 博扶林道 39 Pok Fu Lam Road Tung Ming Court January 2022 Px3 02.jpg 3,000 × 4,000; 4.04 MB
-
 HK SYP ML 半山 Mid-level 博扶林道 39 Pok Fu Lam Road Tung Ming Court January 2022 Px3 25.jpg 3,000 × 4,000; 3.71 MB
-
 HK SYP ML 半山 Mid-level 博扶林道 41 Pok Fu Lam Road Lee Wai Building January 2022 Px3 01.jpg 3,000 × 4,000; 5.1 MB
-
 HK SYP ML 半山 Mid-level 博扶林道 41 Pok Fu Lam Road Lee Wai Building January 2022 Px3 02.jpg 4,000 × 3,000; 5.52 MB
-
-
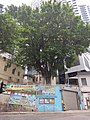
 HK SYP ML 半山 Mid-level 博扶林道 63 Pok Fu Lam Road green leaves August 2023 Px3 01.jpg 4,000 × 3,000; 9.72 MB
-
 HK SYP ML 半山 Mid-level 博扶林道 63 Pok Fu Lam Road green leaves August 2023 Px3 02.jpg 3,000 × 4,000; 10.02 MB
-
 HK SYP ML 半山 Mid-level 博扶林道 63 Pok Fu Lam Road green leaves August 2023 Px3 03.jpg 4,000 × 3,000; 9.65 MB
-
 HK SYP ML 半山 Mid-level 博扶林道 63 Pok Fu Lam Road green leaves August 2023 Px3 05.jpg 3,000 × 4,000; 6.4 MB
-
 HK SYP ML 半山 Mid-level 博扶林道 63 Pok Fu Lam Road green leaves January 2022 Px3 02.jpg 3,000 × 4,000; 5.87 MB
-
 HK SYP ML 半山 Mid-level 博扶林道 63 Pok Fu Lam Road green leaves January 2022 Px3 03.jpg 3,000 × 4,000; 4.49 MB
-
 HK SYP ML 半山 Mid-level 博扶林道 63 Pok Fu Lam Road green leaves January 2022 Px3 04.jpg 3,000 × 4,000; 3.27 MB
-
 HK SYP ML 半山 Mid-level 博扶林道 63 Pok Fu Lam Road green leaves January 2022 Px3 05.jpg 4,000 × 3,000; 6.01 MB
-
 HK SYP ML 半山 Mid-level 博扶林道 63 Pok Fu Lam Road green leaves January 2022 Px3 06.jpg 4,000 × 3,000; 5.58 MB
-
 HK SYP ML 半山 Mid-level 博扶林道 63 Pok Fu Lam Road green leaves January 2022 Px3 07.jpg 4,000 × 3,000; 5.61 MB
-
 HK SYP ML 半山 Mid-level 博扶林道 63 Pok Fu Lam Road green leaves January 2022 Px3 09.jpg 3,000 × 4,000; 5.12 MB
-
 HK SYP ML 半山 Mid-level 博扶林道 63 Pok Fu Lam Road green leaves January 2022 Px3 10.jpg 3,000 × 4,000; 4.21 MB
-

-
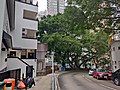
 HK SYP ML 半山 Mid-level 博扶林道 63 Pok Fu Lam Road January 2022 Px3 01.jpg 4,000 × 3,000; 6.29 MB
-
 HK SYP ML 半山 Mid-level 博扶林道 63 Pok Fu Lam Road January 2022 Px3 26 St. Stephen's Church.jpg 4,000 × 3,000; 5.07 MB
-
 HK SYP ML 半山 Mid-level 博扶林道 63 Pok Fu Lam Road nearby August 2023 Px3 01.jpg 3,000 × 4,000; 5.74 MB
-
 HK SYP ML 半山 Mid-level 博扶林道 63 Pok Fu Lam Road nearby bus stop August 2023 Px3.jpg 3,000 × 4,000; 6.81 MB
-
 HK SYP ML 半山 Mid-level 博扶林道 63 Pok Fu Lam Road pink leaves January 2022 Px3 08.jpg 4,000 × 3,000; 4.04 MB
-
 HK SYP ML 半山 Mid-level 博扶林道 63 Pok Fu Lam Road red leaves January 2022 Px3 11.jpg 4,000 × 3,000; 6.79 MB
-

-

-

-
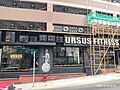
 HK SYP ML 半山 Mid-level 博扶林道 68 Pok Fu Lam Road January 2022 Px3 Kingsfield Tower 08.jpg 4,000 × 3,000; 5.7 MB
-
 HK SYP ML 半山 Mid-level 博扶林道 68 Pok Fu Lam Road January 2022 Px3 Kingsfield Tower 10.jpg 4,000 × 3,000; 5.1 MB
-
 HK SYP ML 半山 Mid-level 博扶林道 68 Pok Fu Lam Road January 2022 Px3 Kingsfield Tower.jpg 4,000 × 3,000; 5.87 MB
-
 HK SYP ML 半山 Mid-level 博扶林道 68 Pok Fu Lam Road Kingsfield Tower January 2022 Px3 31.jpg 3,264 × 2,448; 3.1 MB
-

-

-

-

-

-

-
-
 HK SYP ML 半山 Mid-level 博扶林道 Pok Fu Lam Road Fung Lam Building August 2023 Px3 02.jpg 3,000 × 4,000; 5.62 MB
-

-

-
-

-

-
 HK SYP ML 半山 Mid-level 博扶林道 Pok Fu Lam Road Hing Hon Road The Summa January 2022 Px3 20.jpg 3,000 × 4,000; 6.03 MB
-
 HK SYP ML 半山 Mid-level 博扶林道 Pok Fu Lam Road January 2022 Px3 24.jpg 3,000 × 4,000; 5.23 MB
-
-

-
 HK SYP ML 半山 Mid-level 博扶林道 Pok Fu Lam Road Rose Lane park trees January 2022 Px3 09.jpg 4,000 × 3,000; 6.83 MB
-
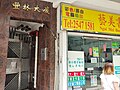
 HK SYP ML 半山 Mid-level 博扶林道 Pok Fu Lam Road shop January 2022 Px3 15.jpg 3,000 × 4,000; 4.83 MB
-
 HK SYP ML 半山 Mid-level 博扶林道 Pok Fu Lam Road shop Wang Kwong January 2022 Px3 17.jpg 3,000 × 4,000; 4.17 MB
-
 HK SYP ML 半山 Mid-level 博扶林道 Pok Fu Lam Road shops January 2022 Px3 16.jpg 4,000 × 3,000; 4.08 MB
-
 HK SYP ML 半山 Mid-level 博扶林道 Pok Fu Lam Road St. Paul's College trees January 2022 Px3.jpg 3,264 × 2,448; 3.59 MB
-

-

-

-

-

-

-
 HK SYP ML 半山 Mid-level 博扶林道 Pok Fu Lam Road Water Street January 2022 Px3 01.jpg 4,000 × 3,000; 4.85 MB
-
 HK SYP ML 半山 Mid-level 博扶林道 Pok Fu Lam Road Water Street January 2022 Px3 10.jpg 4,000 × 3,000; 4.57 MB
-
 HK SYP ML 半山 Mid-level 博扶林道 Pok Fu Lam Road Water Street January 2022 Px3 11.jpg 3,000 × 4,000; 4.83 MB
-

-
 HK SYP ML 半山 Mid-level 博扶林道 Pok Fu Lam Road Water Street Public Toilet January 2022 Px3.jpg 4,000 × 3,000; 4.83 MB
-

-

-
 HK SYP 西營盤 Sai Ying Pun 簿扶林道 Pok Fu Lam Road 17pm September 2020 SS2 01.jpg 2,576 × 1,932; 1.28 MB
-
 HK SYP 西營盤 Sai Ying Pun 簿扶林道 Pok Fu Lam Road 17pm September 2020 SS2 02.jpg 4,128 × 3,096; 3.84 MB
-
 HK SYP 西營盤 Sai Ying Pun 簿扶林道 Pok Fu Lam Road 17pm September 2020 SS2 04.jpg 3,096 × 4,128; 3.62 MB
-
 HK SYP 西營盤 Sai Ying Pun 簿扶林道 Pok Fu Lam Road 17pm September 2020 SS2 05.jpg 3,096 × 4,128; 4.44 MB
-
 HK SYP 西營盤 Sai Ying Pun 簿扶林道 Pok Fu Lam Road 17pm September 2020 SS2 06.jpg 4,128 × 3,096; 4.59 MB
-
 HK SYP 西營盤 Sai Ying Pun 簿扶林道 Pok Fu Lam Road 17pm September 2020 SS2 07.jpg 3,096 × 4,128; 4.18 MB
-
 HK SYP 西營盤 Sai Ying Pun 簿扶林道 Pok Fu Lam Road 17pm September 2020 SS2 08.jpg 3,096 × 4,128; 3.78 MB
-
 HK SYP 西營盤 Sai Ying Pun 簿扶林道 Pok Fu Lam Road 17pm September 2020 SS2 09.jpg 4,128 × 3,096; 4.28 MB
-
 HK SYP 西營盤 Sai Ying Pun 簿扶林道 Pok Fu Lam Road 17pm September 2020 SS2 10.jpg 2,576 × 1,932; 1.27 MB
-
 HK SYP 西營盤 Sai Ying Pun 簿扶林道 Pok Fu Lam Road 17pm September 2020 SS2 11.jpg 4,128 × 3,096; 4.53 MB
-
 HK SYP 西營盤 Sai Ying Pun 簿扶林道 Pok Fu Lam Road 17pm September 2020 SS2 12.jpg 4,128 × 3,096; 3.74 MB
-
 HK SYP 西營盤 Sai Ying Pun 簿扶林道 Pok Fu Lam Road 17pm September 2020 SS2 13.jpg 4,128 × 3,096; 3.74 MB
-
 HK SYP 西營盤 Sai Ying Pun 簿扶林道 Pok Fu Lam Road 17pm September 2020 SS2 15.jpg 2,576 × 1,932; 1.45 MB
-
 HK SYP 西營盤 Sai Ying Pun 簿扶林道 Pok Fu Lam Road 17pm September 2020 SS2 16.jpg 3,096 × 4,128; 3.67 MB
-
 HK SYP 西營盤 Sai Ying Pun 簿扶林道 Pok Fu Lam Road 17pm September 2020 SS2 17.jpg 4,128 × 3,096; 4.78 MB
-
 HK SYP 西營盤 Sai Ying Pun 簿扶林道 Pok Fu Lam Road Hing Hon Road September 2020 SS2 01.jpg 3,096 × 4,128; 5.28 MB
-
 HK SYP 西營盤 Sai Ying Pun 簿扶林道 Pok Fu Lam Road Hing Hon Road September 2020 SS2 02.jpg 3,096 × 4,128; 4.35 MB
-
 HK SYP 西營盤 Sai Ying Pun 簿扶林道 Pok Fu Lam Road Hing Hon Road September 2020 SS2 03.jpg 4,128 × 3,096; 4.83 MB
-

-

-

-
 HK SYP 西營盤 Sai Ying Pun 薄扶林道 Pok Fu Lam Road Li Sing Primary School August 2020 SS2.jpg 2,576 × 1,932; 1.48 MB
-
 HKU ML 香港大學 Mid-levels 薄扶林校園 Pok Fu Lam campus view nearby buildings August 2022 Px3 01.jpg 4,000 × 3,000; 4.82 MB
-
 HKU ML 香港大學 Mid-levels 薄扶林校園 Pok Fu Lam campus view nearby buildings August 2022 Px3 02.jpg 4,000 × 3,000; 4.36 MB
-
 HKU MTR Station 香港大學站 Lift tower lobby footbridge view Pokfulam Road Nov 2017 IX1 01.jpg 2,048 × 1,368; 1.37 MB
-
 HKU MTR Station 香港大學站 Lift tower lobby footbridge view Pokfulam Road Nov 2017 IX1 02.jpg 2,048 × 1,368; 1.51 MB
-
 HKU MTR Station 香港大學站 Lift tower lobby footbridge view Pokfulam Road Nov 2017 IX1 03.jpg 2,048 × 1,368; 1.46 MB
-
 HKU MTR Station 香港大學站 Lift tower lobby footbridge view Pokfulam Road Nov 2017 IX1 04.jpg 1,368 × 2,048; 1.76 MB
-
 HKU MTR Station 香港大學站 Lift tower lobby footbridge view Pokfulam Road Nov 2017 IX1 05.jpg 2,048 × 1,368; 1.43 MB
-
 HKU 香港大學 PFL campus 薄扶林校園 Haking Building 李國賢堂 Simon K.Y. Lee Hall April 2019 SSG 01.jpg 3,264 × 2,448; 2.34 MB
-
 HKU 香港大學 PFL campus 薄扶林校園 Haking Building 李國賢堂 Simon K.Y. Lee Hall April 2019 SSG 02.jpg 3,264 × 2,448; 2.19 MB


